The Big Fish Exhibit – A Project in Progress
Long Time No See, Huh?
To start off, I know I don’t post a lot. My apologies, but also things take a lot of time, and with my day job that time gets even longer. But, instead of ghosting this website for 2+ months between projects, I wanted to make some smaller posts every week or so. So going forward, I’ll try to make at least one project in progress post once a week about what I had been working on! So, lets get started!
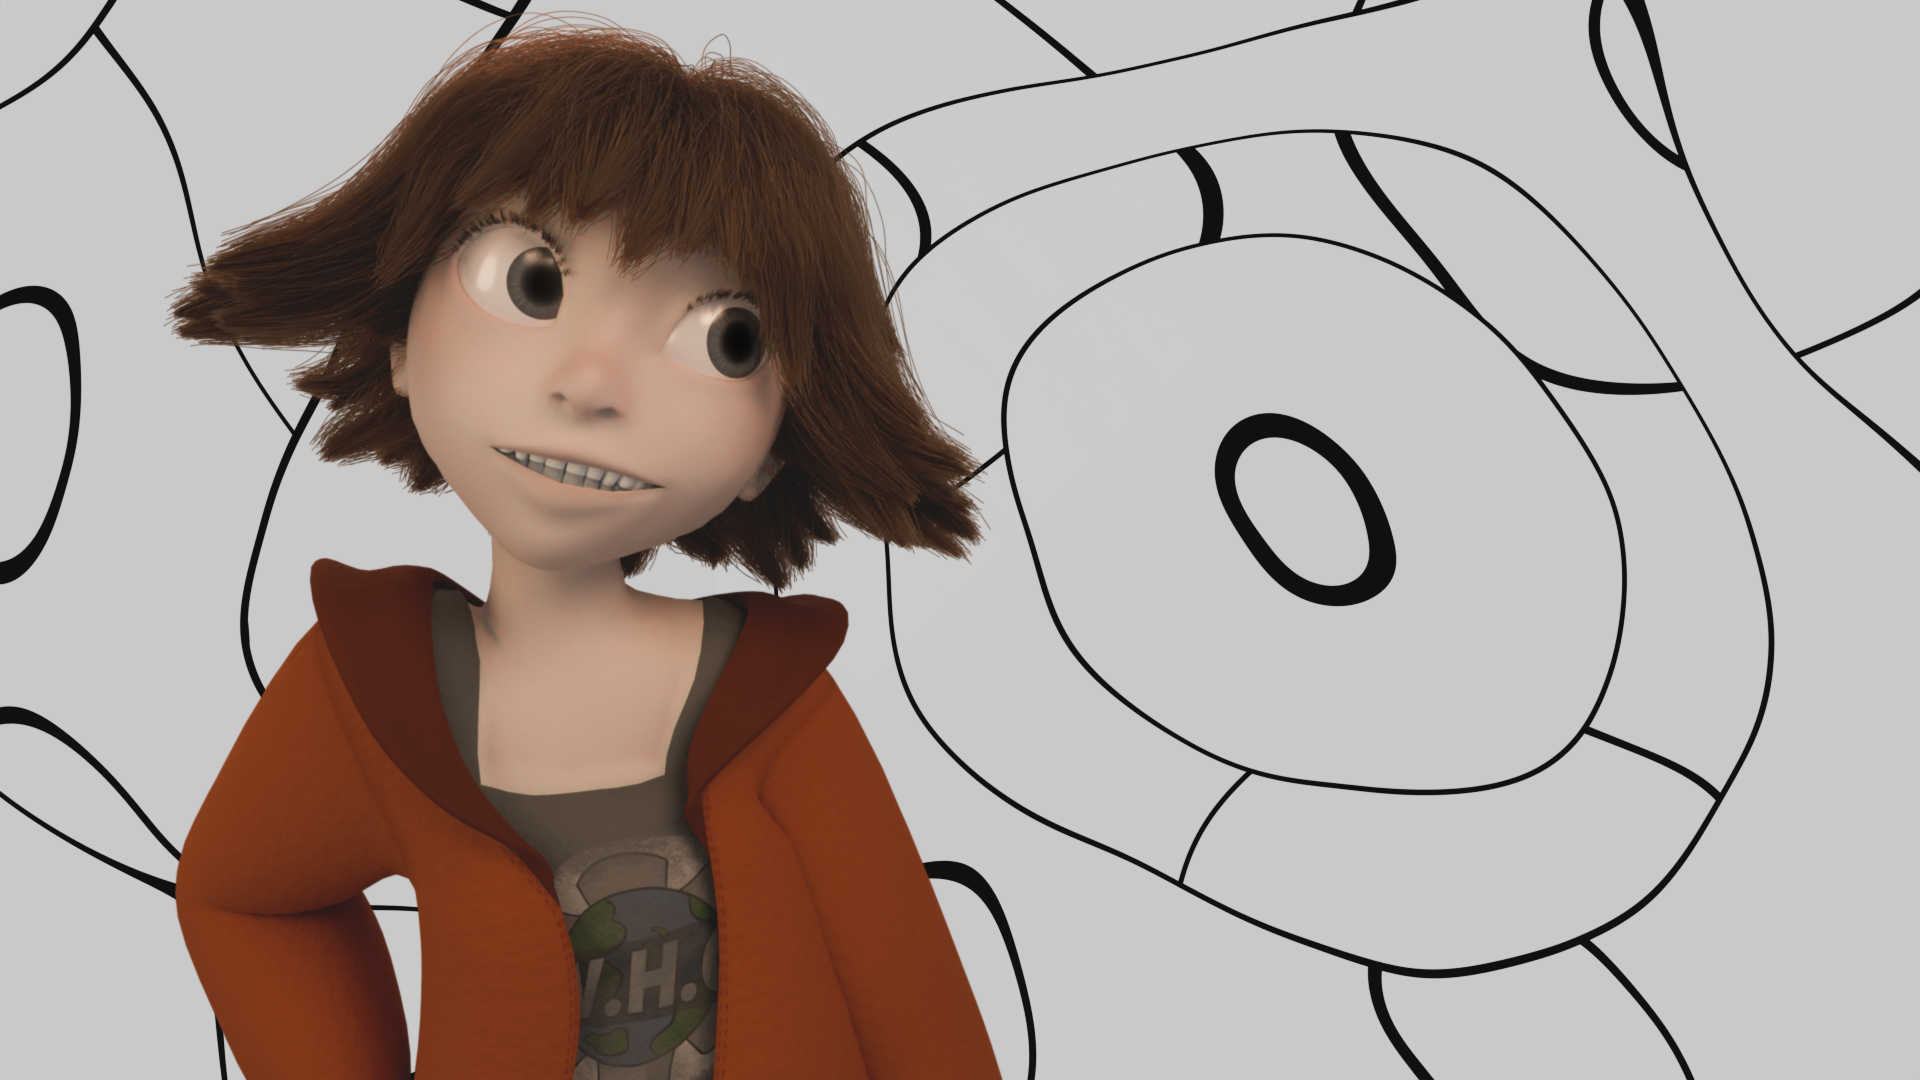
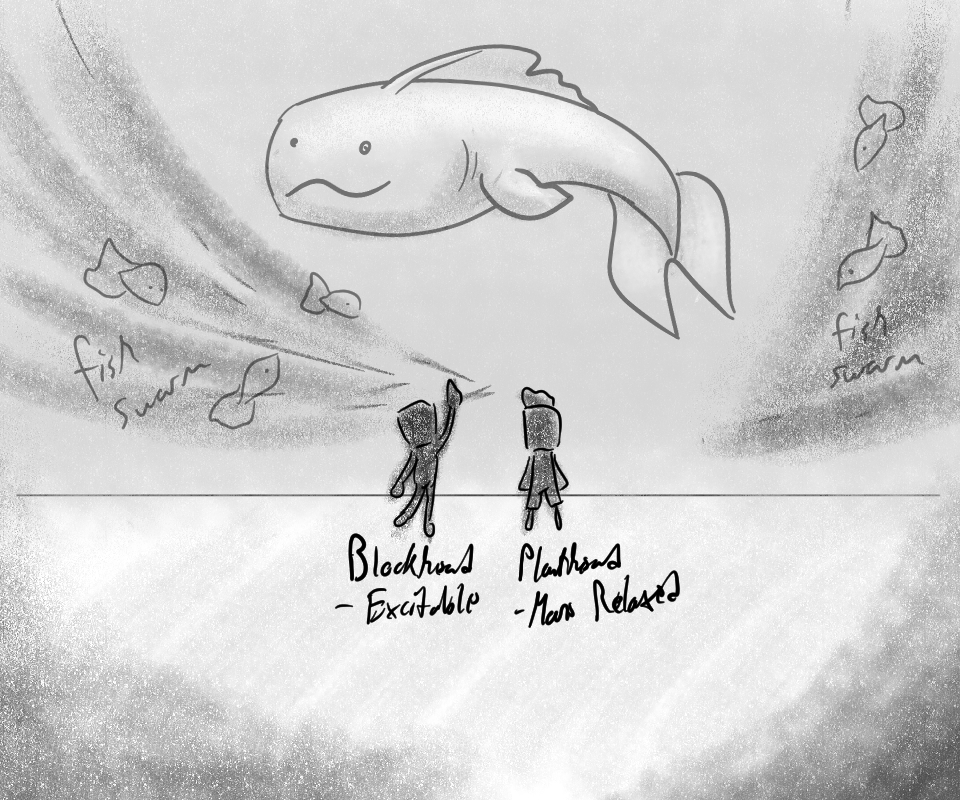
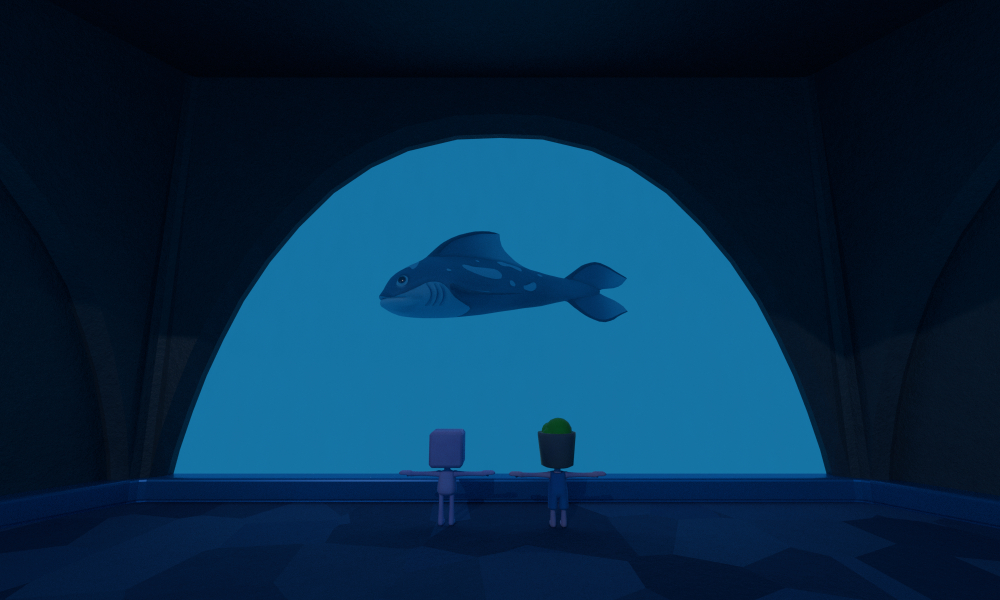
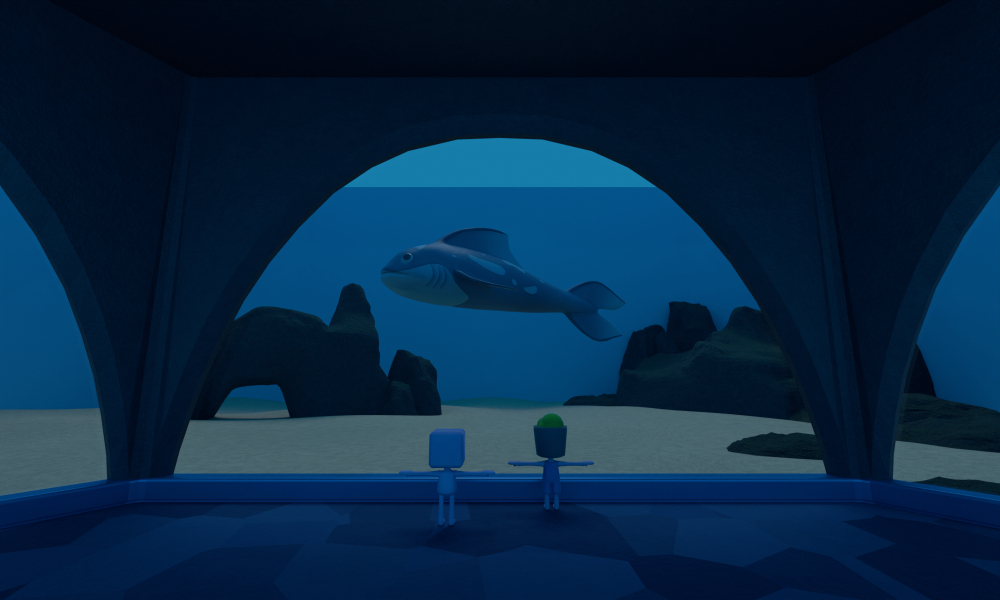
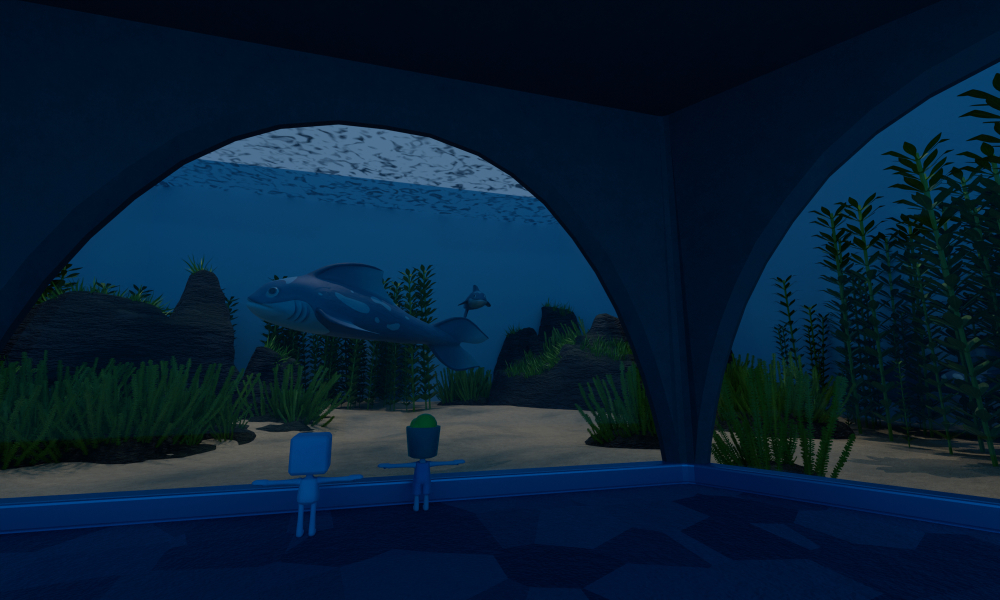
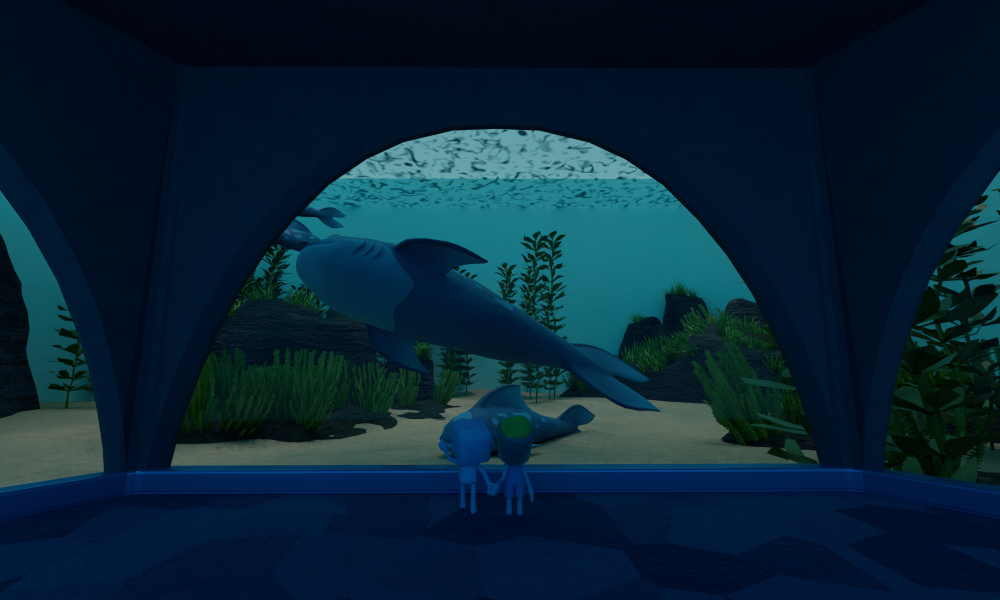
For this week, its The Big Fish Exhibit! This is a continuation of Blockhead’s and Planthead’s visit to Blue Dot City, as started with my last post My Rediscovered Love for Blender, and What I Made. This time, they are visiting an aquarium, or rather one of the exhibits in the aquarium. Below is the concept sketch for the piece, and a few of the renders I made to mark my progress.
Plants: Part Two
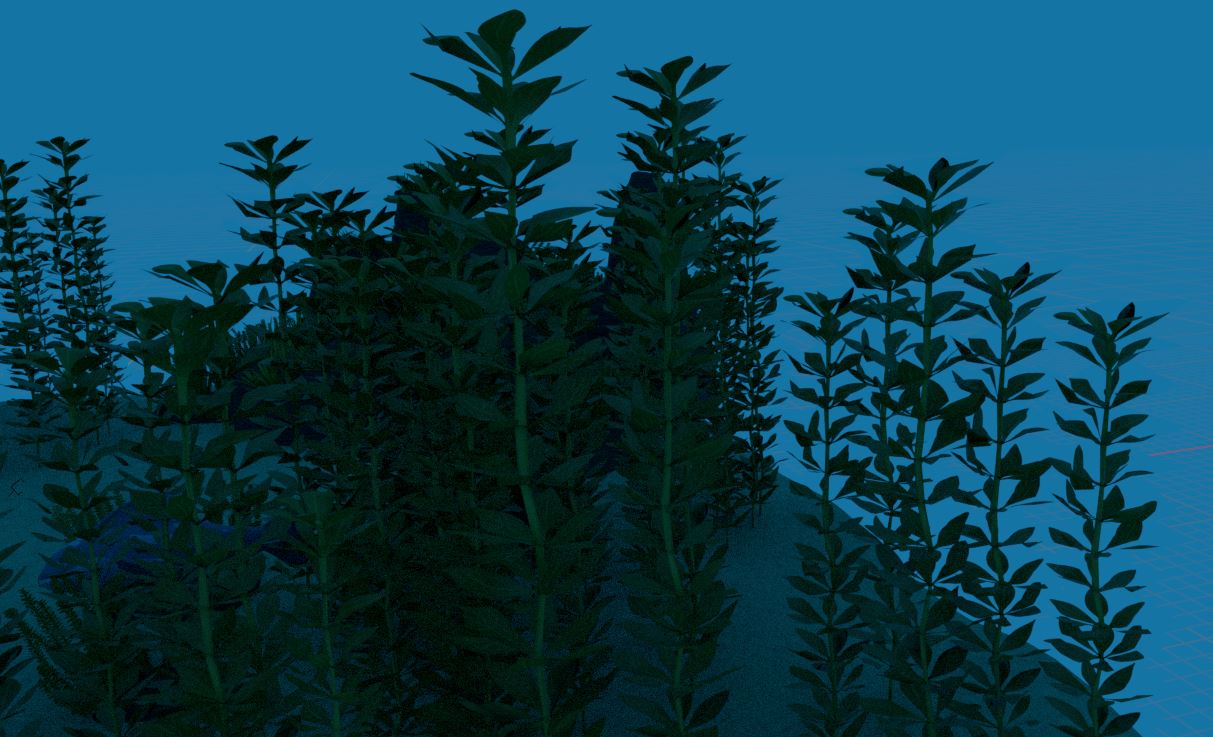
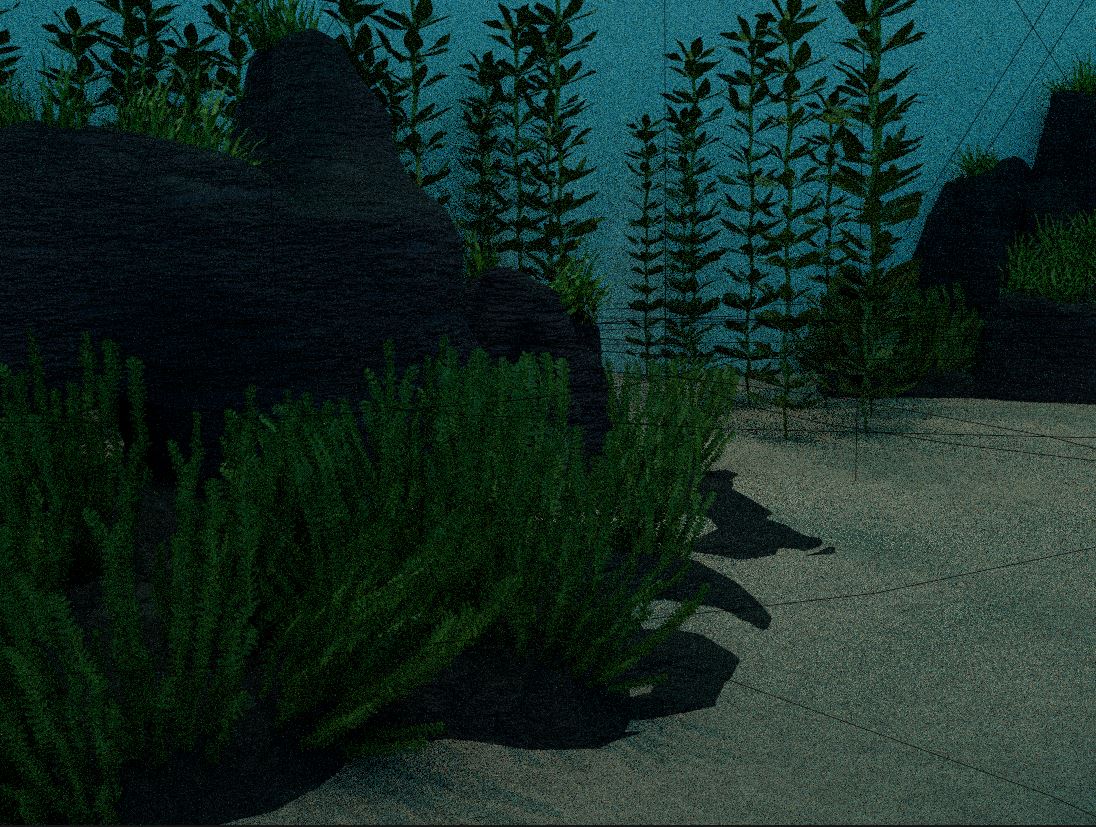
To fill space in the aquarium, I wanted to add sea plants: two different types of sea grass and kelp. In my last post on this series, I mentioned not being great with plants. For the most part, I’m still not, but I’m slowly learning the secrets of the foliage.
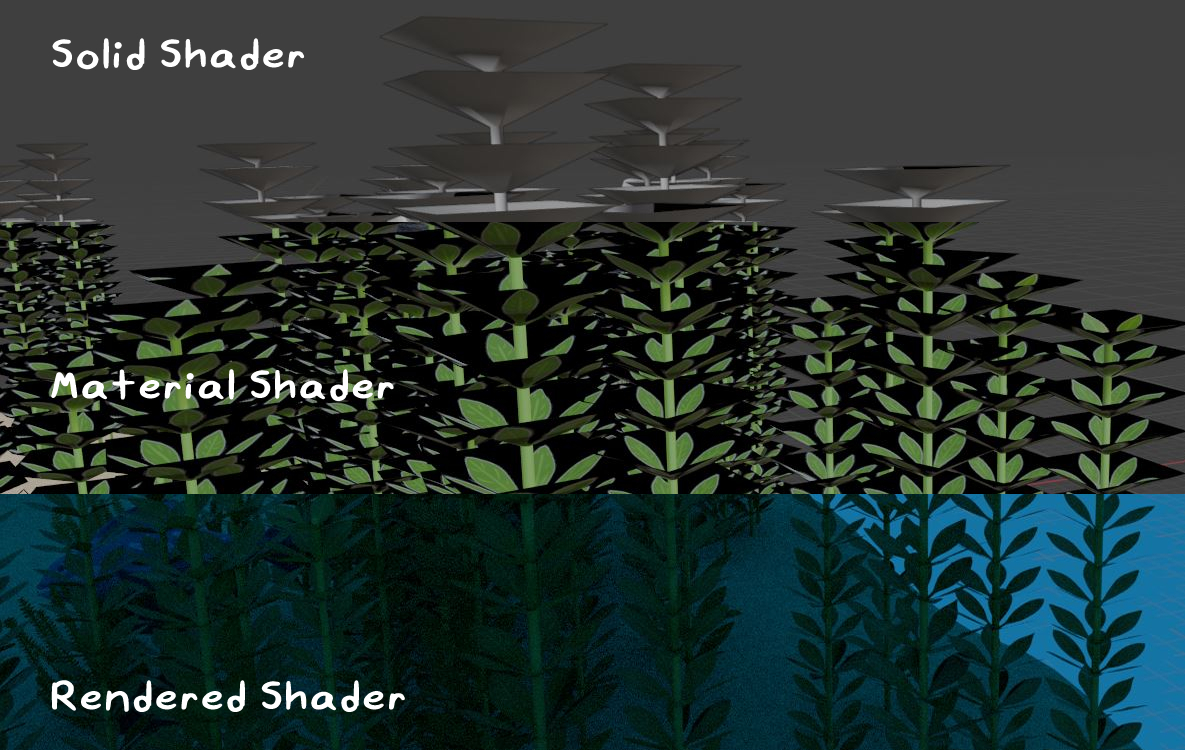
For the sea plants, I really wanted to keep the number of vertices per plant as low as possible. This was because I knew that there would be a lot of them, and they would all be moving. It would take a toll on my rendering time if they were too complex. So, I tried to keep the models to simple planes and primitive shapes. The more complex leaves would instead be done via material nodes, adding a version of the texture that would be plugged into the alpha channel. Then, the whole thing would be made to look more 3D using the textures and the Cycles rendering engine.
In the past, I used the hair particle system to render out many different plants at the same time. However, since its an animation this time, and meant to be underwater, I had to switch it up. While hair particles rendered to look like objects are fine with still images, they move rather peculiarly. This is because even though it looks like a 3d rendered object in place of the default hair path, functionally it is just that with the object’s image stretched between the two ends, like a sail on a mast.
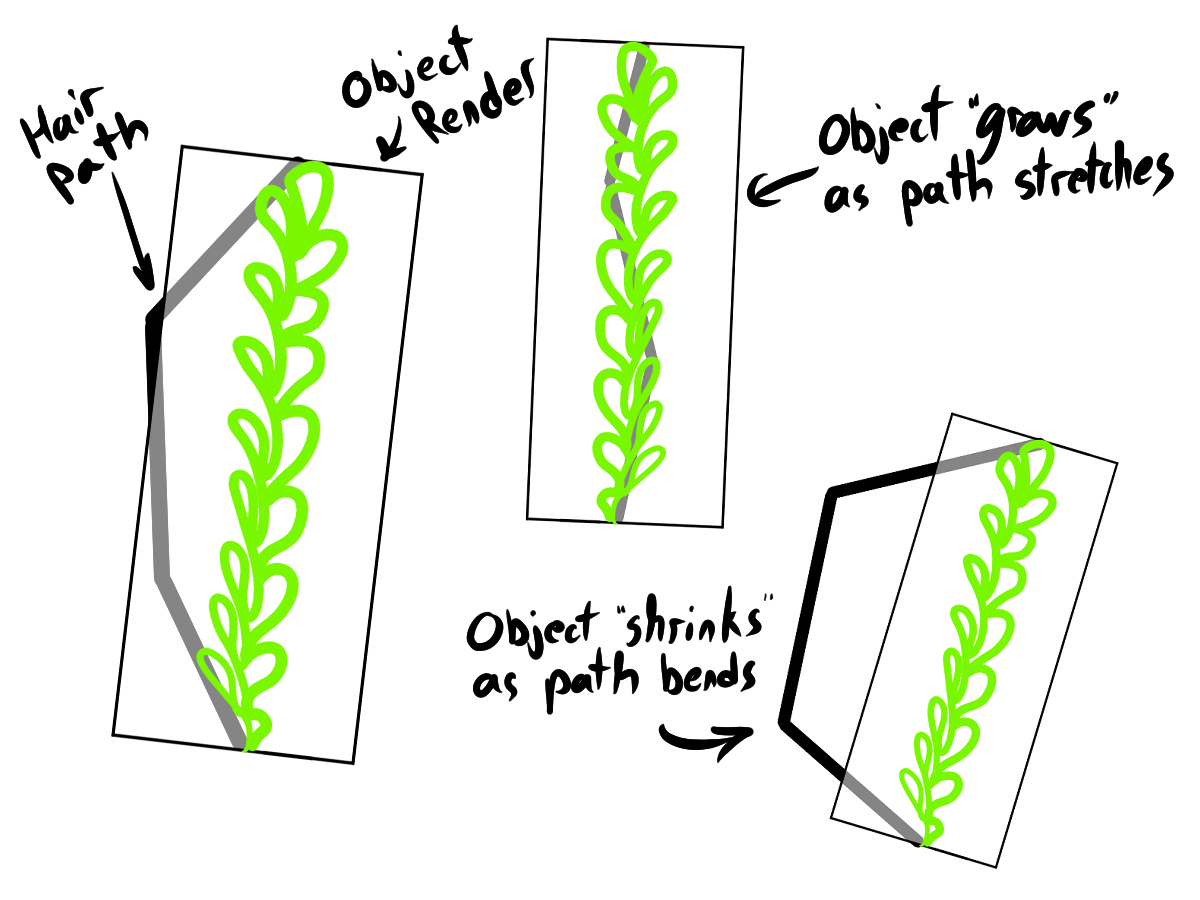
When the hair path bends and twists, rather than warping the object’s geometry, its instead shrunk, blown up, or rotated depending on where those two ends are. On plants that you would expect to bend and sway in the water, seeing them instead spin like a top or shrink into the floor is awkward to witness.
Therefor, I switched from particles to geometry nodes, that which I hadn’t touched yet but was eager to try out. This way, I found I could apply a soft body simulation to the master object that would also be applied to its instances. I got seemingly the best of both worlds: the “bend and sway” effect essential for undersea flora and a render time that wouldn’t outlive me. Less perfect is the fact that they are all copies of the first, meaning their simulation will behave in the exact same way as their brethren like an inefficient hivemind.
The Trials of Animation
But at that point I decided to move on to the animation and deal with the kelp another time. After blocking in the animations for all my actors, I decided to start with Blockhead’s animation and work from there. This includes various poses and three different walk cycles, which came with their own trials and tribulations.
I had some trouble with his walk cycle in the beginning as I wanted it to look like Blockhead’s feet were making him move and not the root object moving while the animation plays. I first tried a super complex method with the “limit location” bone constraint. With every step he took, I would locate the position using the 3d cursor. Next, create a keyframe that would lock his foot to that exact location on the bone constraint with 100% influence, rendering it immobile. Then, move the animation to the next step, and in two keyframes I would switch which foot had 100% influence and which did not. I would have to make sure to map the next step with the 3d cursor because the bone constraint mapping did have to change with every step. Finally, it was onto the next step, and continue on from there. If that sounded overly complicated, that’s because it was.
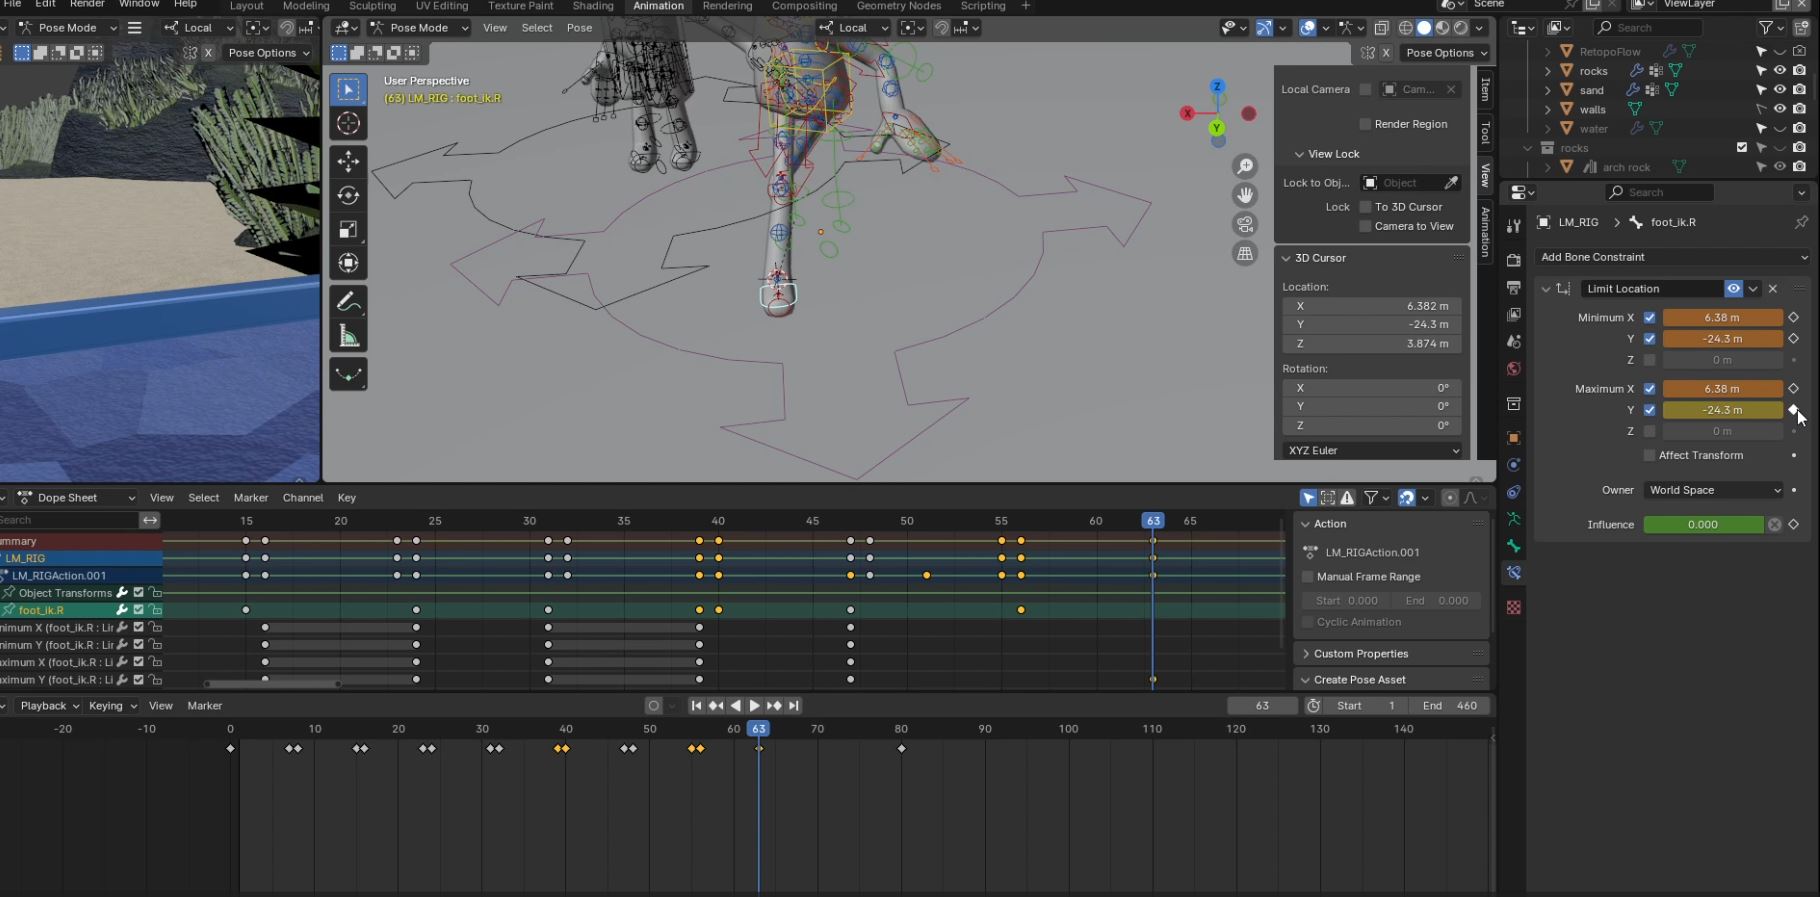
This quickly caused a lot of problems, and a lot of frustration. Though I couldn’t see it, when the character started to move at an angle he got just ever so slightly faster. Either that, or moving at an angle didn’t mesh well with the feet remaining stuck in a world position. Either way at some point his legs began to stretch impossibly far. It looked unrealistic, and frankly painful, even for a character literally made to look like a plush toy. And if I so much as breathed on the root animation, the loss of influence on the bone constraint between frames caused this awkward “popping” where the foot would move suddenly into a different position. It was especially noticeable when he was moving at an angle.
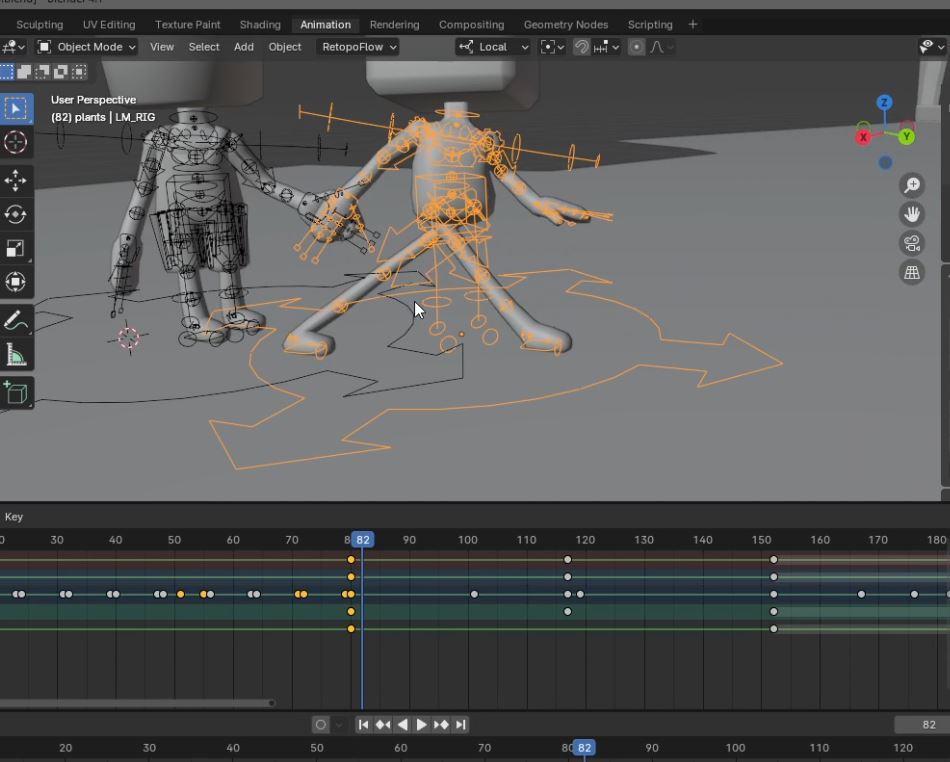
The more I tried to fix it the worse it got, so I ended up deleting the whole thing and starting over. In my second attempt I just had him take a step every few frames to keep up with the speed of the root animation. Though there was some foot sliding, between his speed and how far away the camera was it was very hard to notice. At least, it was hard for me to notice, when the animation is finished you can let me know if I’m wrong.
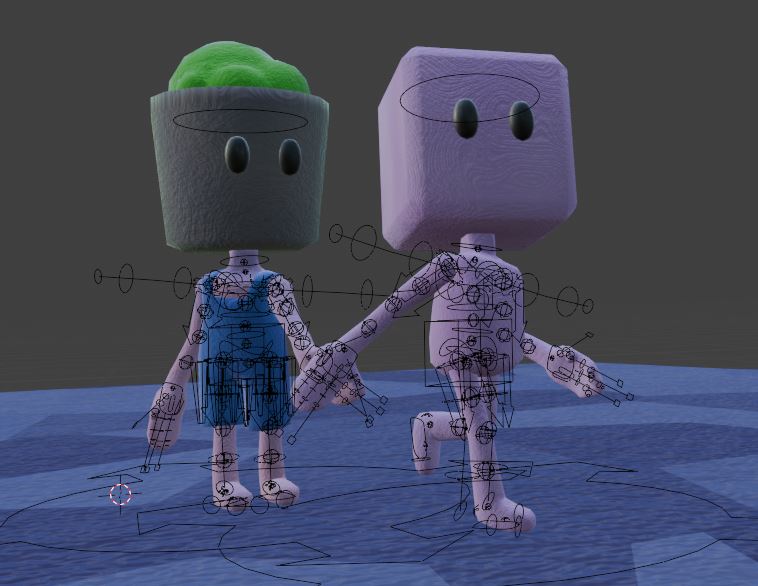
I have a bit more to do with Blockhead, but then I’ll move on to Planthead. His actions will be more relaxed then Blockhead, who I’m picturing as the one who really wanted to visit the aquarium, thus he’ll be a bit easier to animate overall. I will still have to keep in mind that the two are holding hands during the first half of the animation. So during the first walk cycle at least he’s going to be doing a lot.
After both of them are done I’ll move on to the large fish, four of them total. I’m still undecided on how they will move during the sequence. I’m a bit more lenient with myself with the fish animation since I only really planned to have one of them swim in front of the glass. Everything else is just making sure they aren’t moving awkwardly in front of the camera. And finally, I’ll be tweaking the sea plant’s soft body simulations and adding some smaller fish to the aquarium as a particle effect controlled by a force field. I haven’t played with any of Blender’s force fields yet, so I’m hoping to have some fun with it.

I could also probably use Unity to code a flocking AI to control the smaller fish more realistically, then combine it with the Blender render in post-production. However, I want to keep this project in Blender as much as I can so its not too complex. I even considered adding more fish, but again, I don’t want this getting too complex. As much as I love this project, I also want to work on other things.
And that is about it for this project in progress! I’ll go into greater detail about the project when the animation is complete, so look out for that! Thank you for bearing with me with this small update. I’m projecting to have it ready by the end of May, but I’m crossing my fingers that it’ll be done before then. I’m also recording my progress as much as I can, so I’ll hopefully have a video about the project after its complete!
Until next time!