How I Made it to the Finalists of the SciArt Challenge: Part One
What is the SciArt Challenge?
Hello again near the end of 2024! For this post I wanted to go over a new project that I just recently finished up, and a very special one at that. This year I made it into the finalists of the SciArt Challenge hosted by the RenderMan team!
RenderMan is an external rendering engine made by the folks over at Pixar, who probably need no introduction. But in addition to the Pixar movies, its also used in several other productions such as Nimona, Guillermo del Toro’s Pinocchio, and the new Wicked movie adaptation among dozens of others. They also offer a non-commerical version for anyone to try, which is what I did.
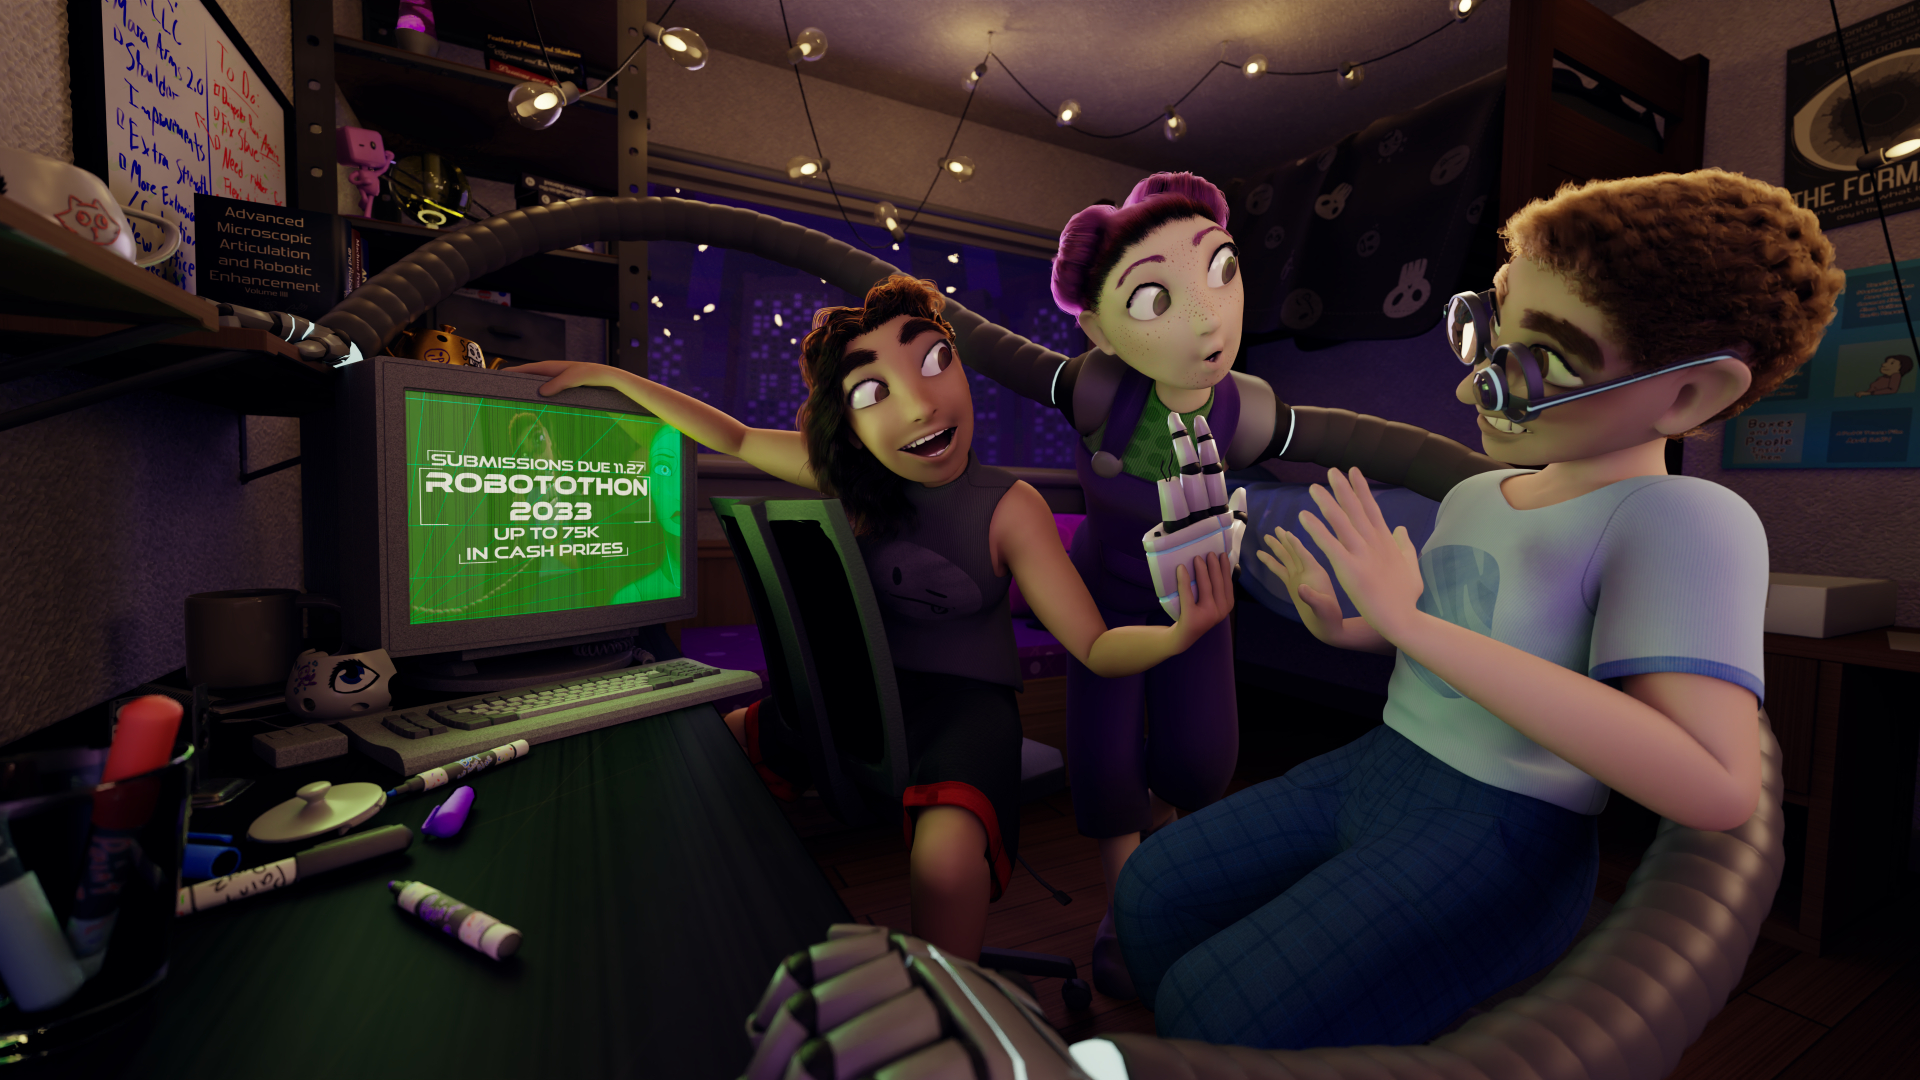
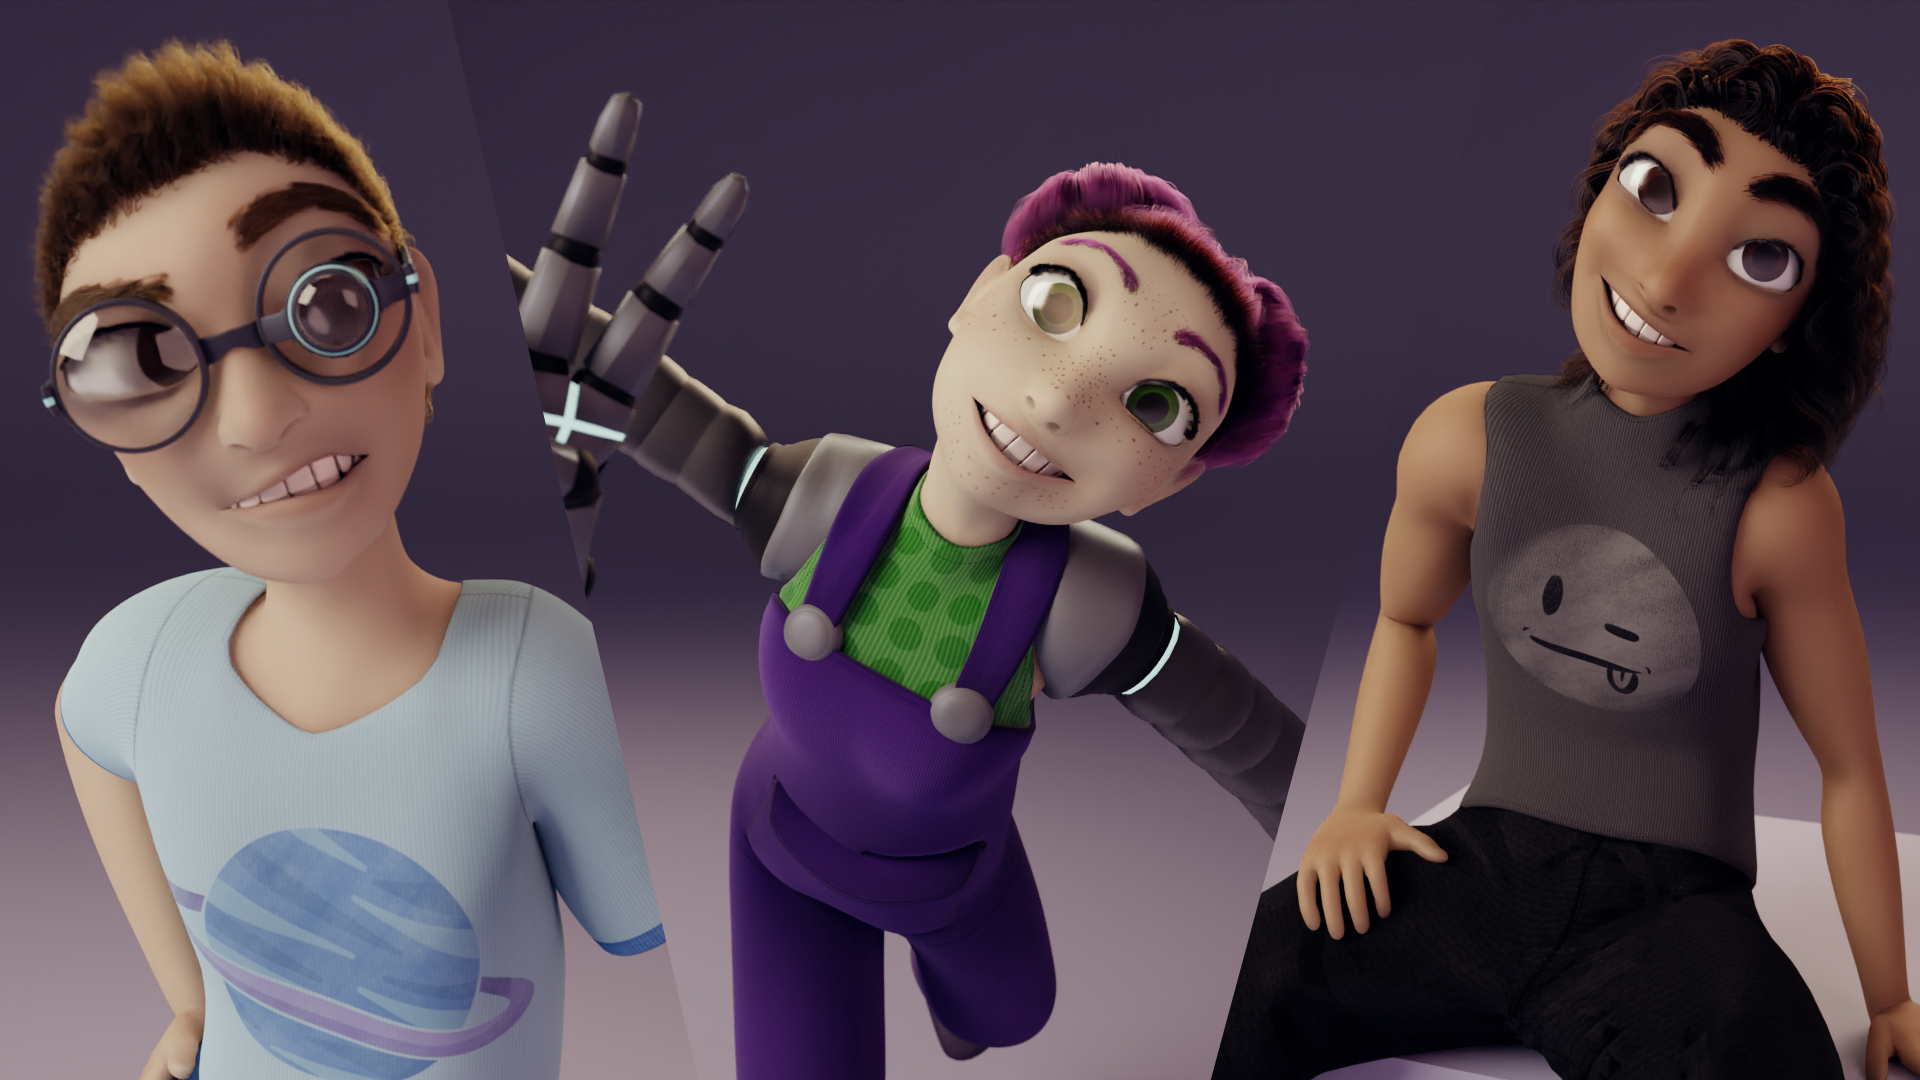
The SciTech Art Challenge was my first time using the RenderMan engine for anything, and I’m super happy I made it to the finalists. While I will go into the details of my final image, dubbed “Robotothon 2033”, that will be for another time. For this post I wanted to start with the characters I made for the project: Finley, Mara, and Alex. They each had their own highs and lows when it came to the process of creating them an the final result, so I thought it best to dedicate an entire post to their creation. Let’s get started!
Before Going into Specifics
When creating each character, I started with a sculpt of a base model that I would then alter to fit each of the characters according to their initial sketch. Then, I would retopologize each sculpt to have some clean geometry for animation. True, I could have cleaned up the geometry of the base sculpt first then changed copies to suite each character, but I wanted the practice.
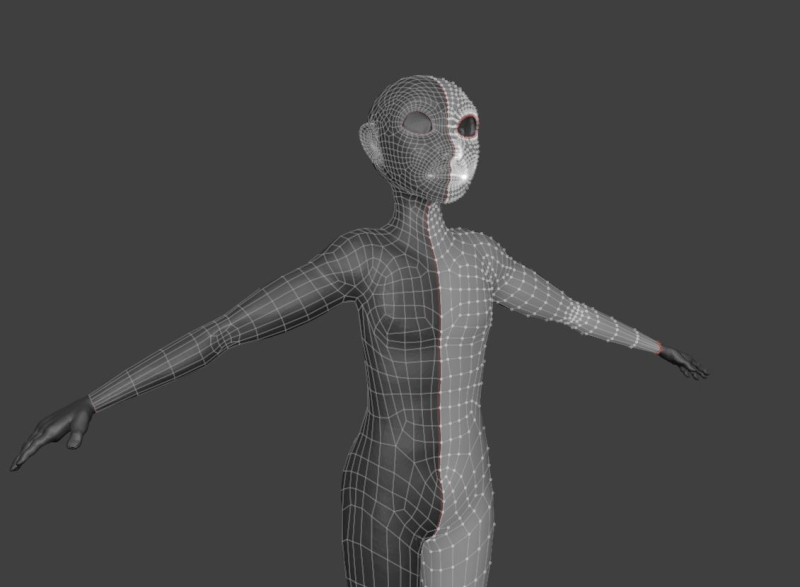
After I was done with the base model, I layered the clothes on top as separate objects. This way, if I wanted to change their outfits later it would be more straight forward to. It wasn’t like I would be rendering anything in real time, so the amount of vertices could be more forgiving than in something like a video game. All three characters had a very similar pipeline, so to avoid redundancy I’ll just go over the unique successes and challenges of each character, starting with Mara.
Mara and the Longest Arms I’ve Ever Made
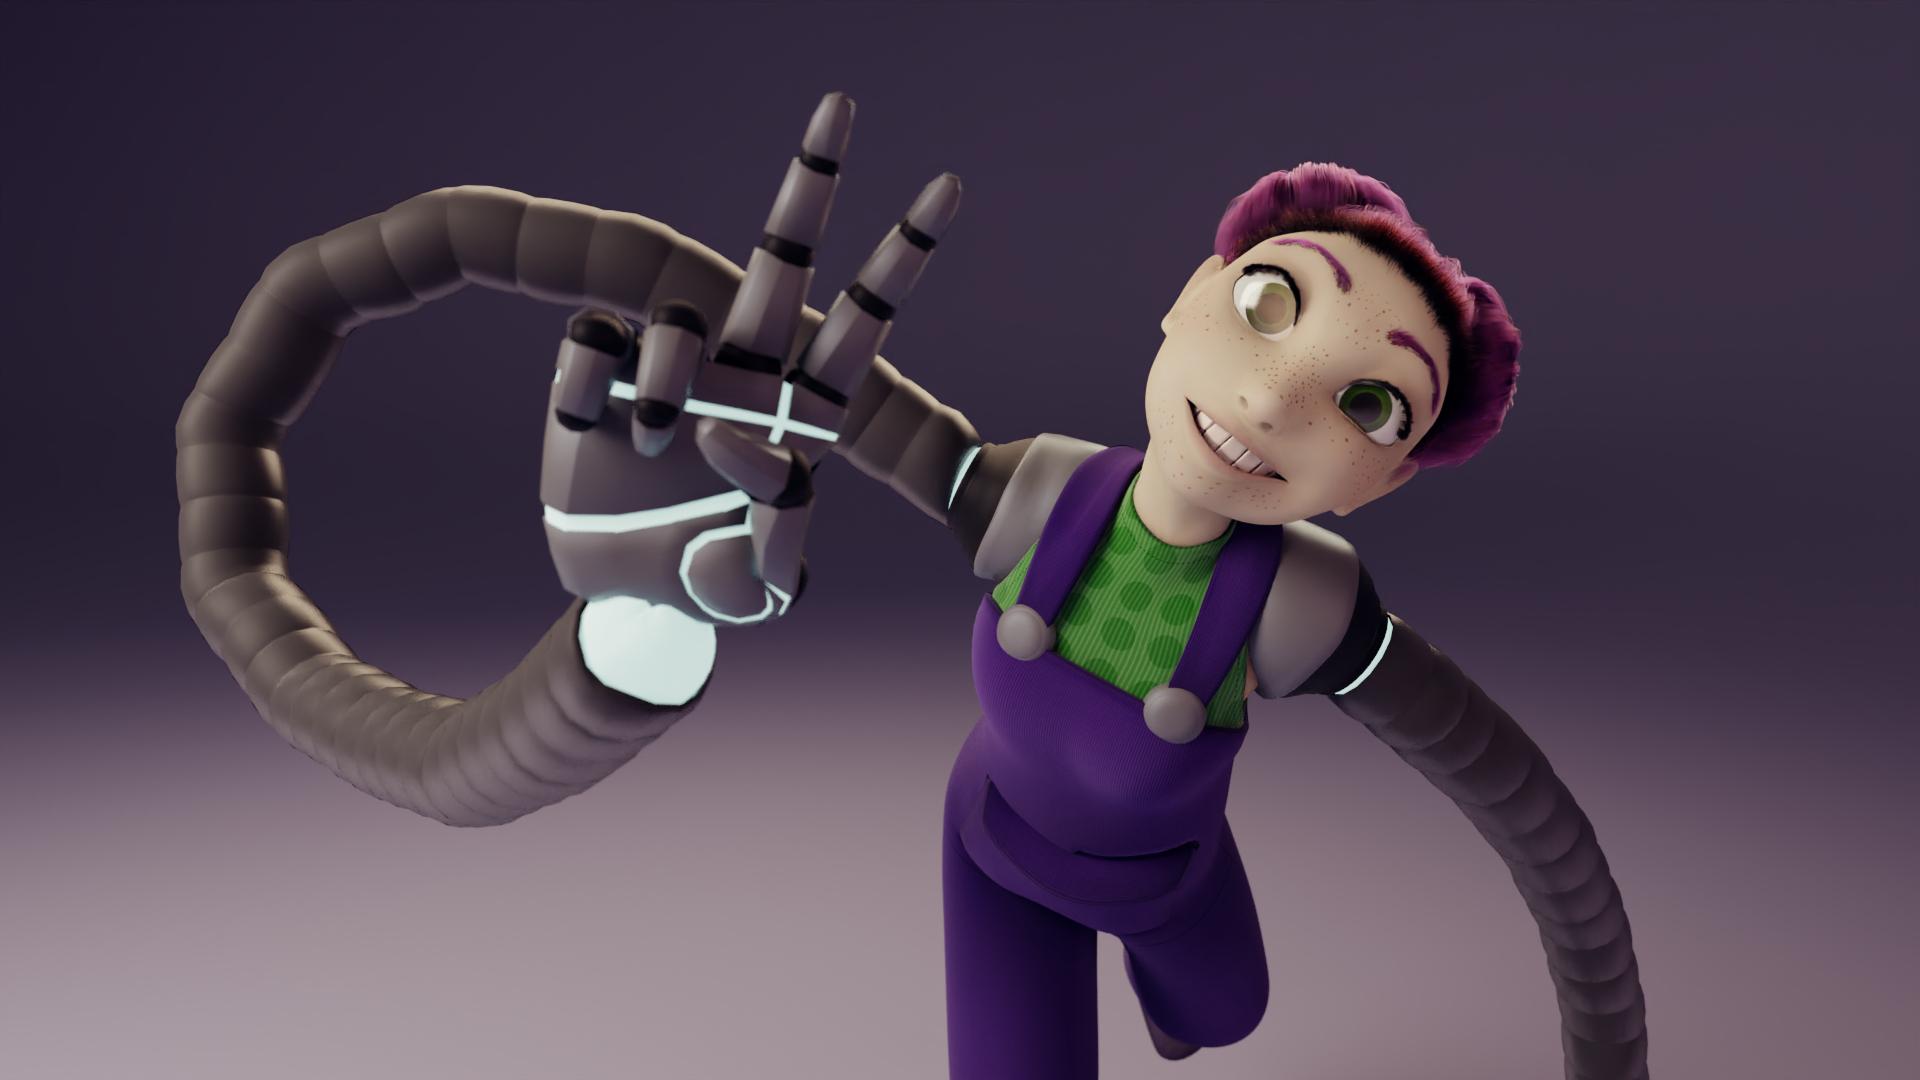
Mara was my personal favorite of the bunch. Between the space buns, the super long robot arms, and the general happy go lucky demeanor, her design was the most appealing by far.
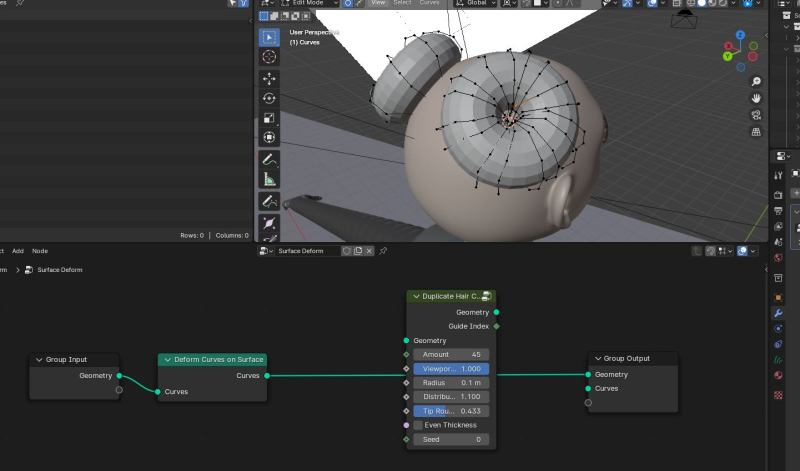
To make her hair, I used a mix of geometry nodes and the regular hair particles. The hair particles were used to create her scalp, with the hair pulled back to only appear as though they contributed to the buns. To make the space buns I first made a few manually placed curves as a guide. I positioned each vector of the curve individually in edit mode to form the bun shape, using a torus as a guide. Then, with geometry nodes, I duplicated the guide curves by the hundreds and tweaked the settings until the entire torus was covered in hair.
Finally, RenderMan has a great hair color node that allowed you to alter the amount of melanin, redness, and dye in the hair for a more realistic look. I used that to dye the hair pink. Fun fact, for each character I used the same hair color node to color both their hair and their eyebrows. This is made fun by the fact that Mara’s hair is dyed pink, so it looks like she also dyes her eyebrows pink. I could have made the eyebrows a separate material, but I chose not to.
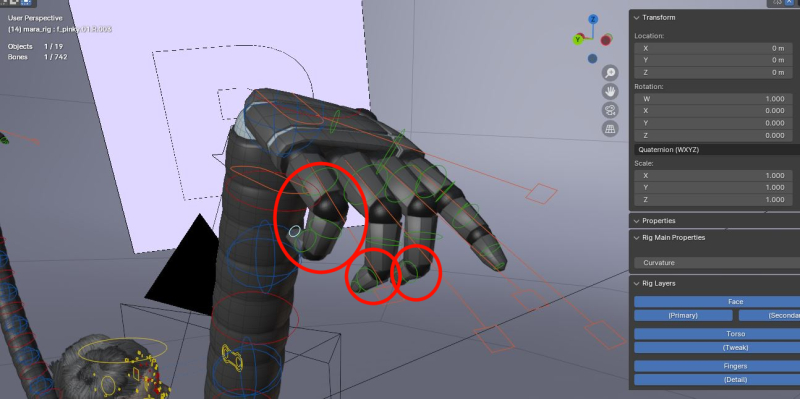
To create her arms I used separate objects for things such as her joints, shoulders, arms, and the hands themselves. Each joint in her fingers is a separate sphere joined with the hand geometry to create one object. The hand itself is a loose retopology of the hand sculpt I made in the base model. I added extra lines around where I figured some flexibility would be and colored them using a separate glow material. The same material would be used for the sphere at her wrist joint and shoulder joint.
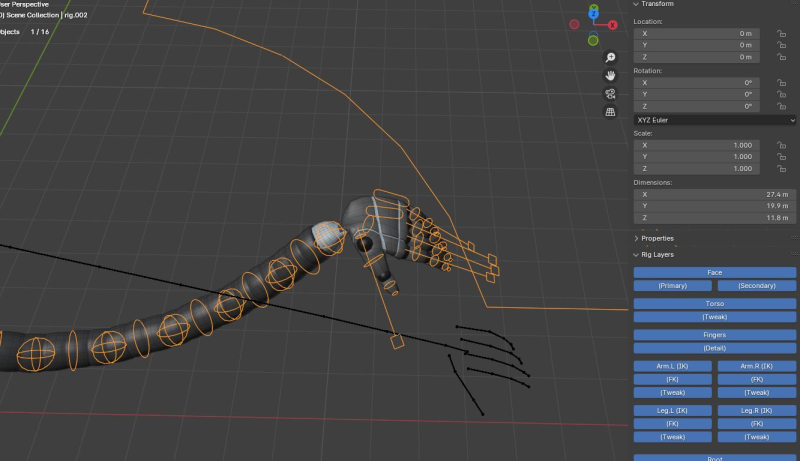
For her rig, I used Blender’s Rigify add on like the others, but had to get rid of the default arm and replace it with a tentacle rig with a hand rig stuck at the end. To move the entire arm with the hand I added an IK rig constraint on the bone closest to the hand, with the hand as the target and the chain long enough to go to just before the shoulder, around 12-13 bones. This meant the hand itself was parented to the root of Mara’s rig rather than anywhere on the arm or shoulder. Even if the entire body moved, the hands would remain right where I put them.
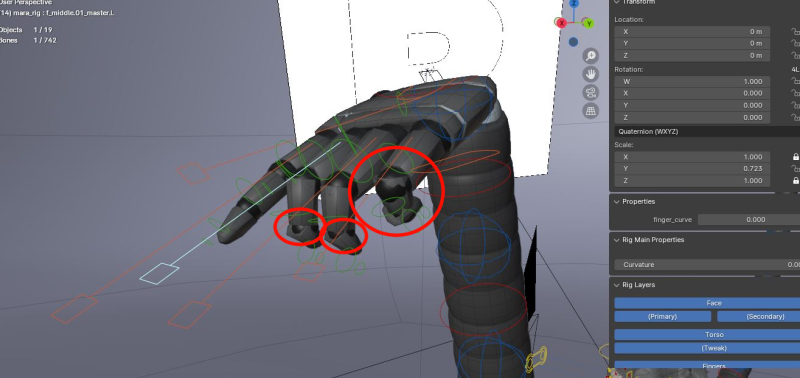
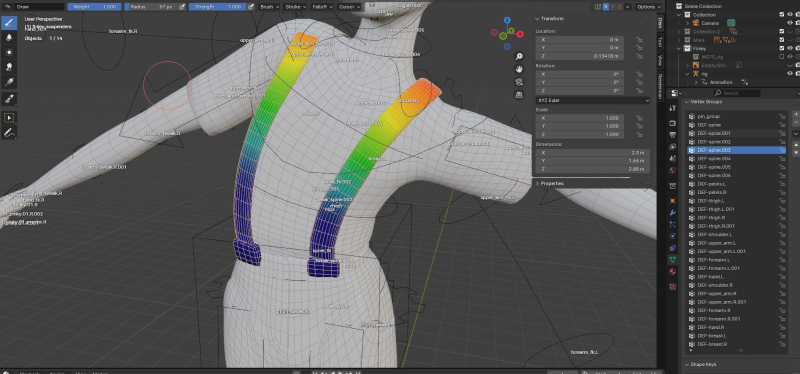
While I am happy with the arms in general, they are also very flawed. Late into production I tried to tweak the weight painting of the hands to make them look a little more robotic, and accidentally screwed up the left hand. Now, flexing her fingers would cause the joints to intersect with her hand. I would fix this normally by unparenting and reparenting the arms to the rig with automatic weights. Doing so would cause the weight painting to basically reset to default. But I tried that and the hands remained the same, though everything else was reset.
If it wasn’t the weight painting, then my other theory was that the left hand was messed up by by when I tweaked the bones of the rigify model to make them correlate more to the joints of the hand. But if that’s the case, then the right hand should be effected to since I had on symmetrical editing at that time. That would cause any change on one side of the rig to mirror to the other. But if for whatever reason the symmetrical editing just didn’t work on the right side, to fix this I may need to regenerate the entire rig. That’s not something I really want to do since I’d have to unparent and reparent the rest of the body in the process or risk my computer crashing from the added computational effort.
Between the close deadline and my day job, I had little time to try to fix the hands so I made sure keep the error out of sight. I’d say I’d fix it later, but I’d prefer to just redesign her arms completely and take out the separate sphere joints altogether, so I’m not too pressed about it. That is a project for later though, on to the next character!


The Creation of Finley
Next up is Finley! They’re the inventor, the one who created Mara’s arms in the first place, and also the grumpy one that balances out Mara’s more cheeful demeanor. I find it important to have at least one opposite personality in the group for more interesting character dynamics.
Finley was the one who went through the most outfit changes out of the three. Between creating the characters and finishing the entire image, Alex got his tank top lightened and Mara’s overalls were made more purple. Finley, however, got an entire palette swap, lost their suspenders, and got new glasses.
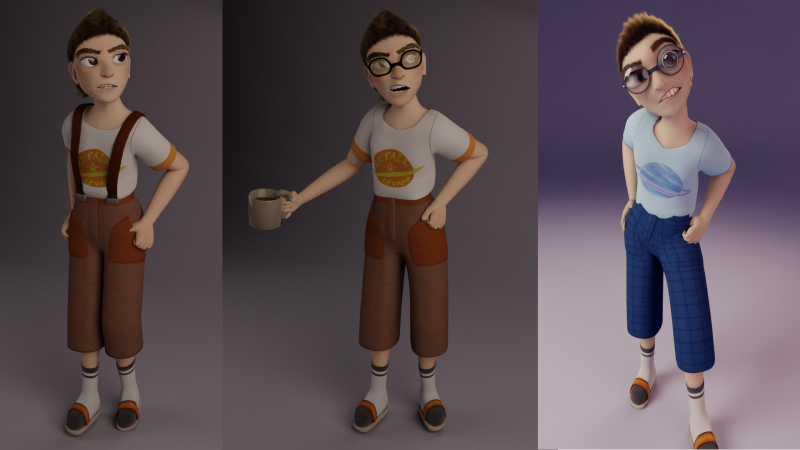
The suspenders were honestly because they were too much of a hassle to weight paint for something not that integral to the character design in my opinion. Their exclusion also made it easier later on when I decided to palette swap the outfit. The original outfit was designed to look bad because I wanted to show visually that they had no fashion sense. However, it wasn’t adding that much to the final image, so instead I turned into blue pajamas to match their comforter in the background.
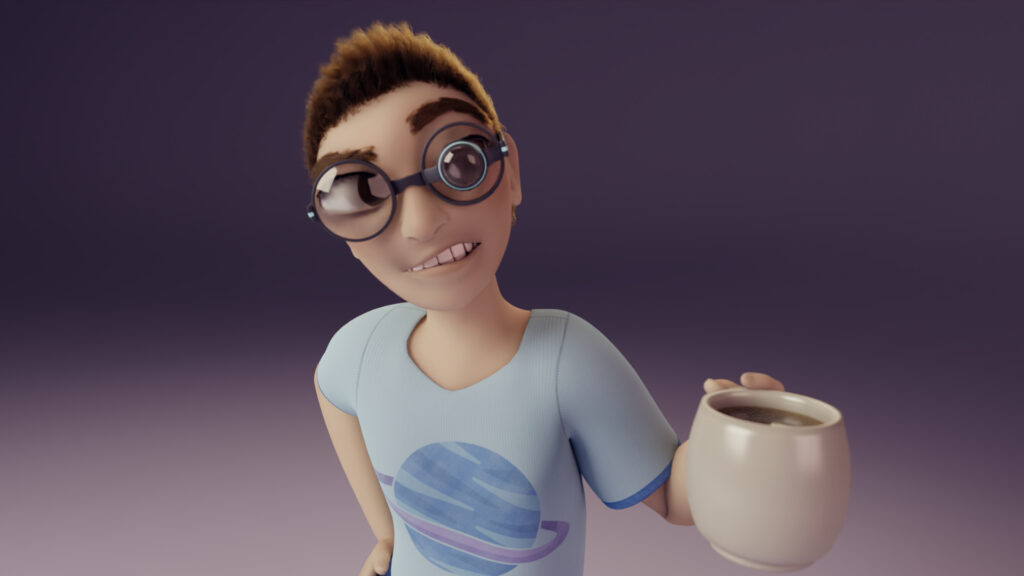
I originally intended Finley’s glasses to be blue light glasses, glasses with a yellow-tinted lens meant to filter out blue light on monitor screens. Some of the students at my university would wear them. Later I decided to make the glasses more like goggles to make them more eccentric. I also added a faded blue glow as some detail lines to connect them visually to Mara’s arms. While the glasses do look cool by themselves, as you can see in the final image the bubbled lens can magnify their eye at certain angles and make it look goofy.
Also, fun fact about the cup I used as a prop in this image. Technically the cup is supposed to have tea in it, but since I was too lazy to make my own material I used one of RenderMan’s default materials for whiskey. I used the same material for the tea in the above example of one of Finley’s outfit changes. So Finley here is actually posing with a cute, cozy coffee mug full of straight firewater. So with that, lets move to the final character.

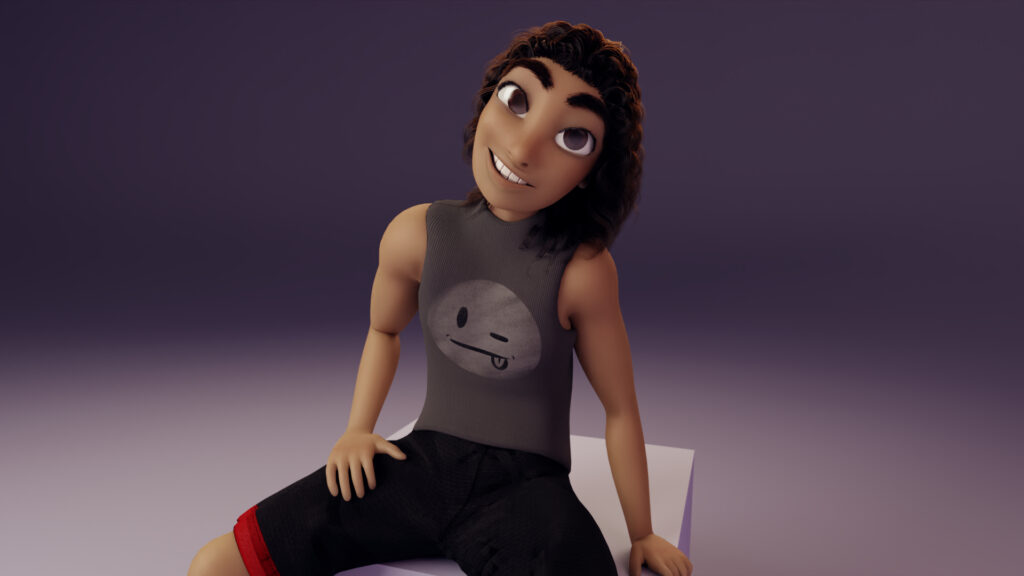
Alex and the No-Good Hairdo
Finally, we have Alex, the artist in the trio. I wanted him to appear easygoing and relaxed. If the three were on a graph of least to most friendly/approachable, Alex would be somewhere in the middle between Finley on the low end and Mara on the high end. His art was mostly centered around emojis, skulls and other freehanded doodles, which reflect in various points of the environment I’ll go over in the next post.
His outfit was the simplest of the trio, with a pair of shorts I based off of a real pair that I own and a tank top. I changed the tank top from black to grey later in production as an attempt to distinguish it from the black of the chair he was sitting on. It didn’t really work as intended but it also made it easier to define the cloth texture so I kept it gray.

The biggest problem was with Alex’s hair. I wasn’t keeping track, but between the initial creation of his model and the final submission, I ended up having to redo the hair multiple times. That was more than the amount of work I put into Finley’s and Mara’s hair combined. Granted, Finley’s hair also required some work to fix graphical errors and make it more believable, but that was minor tweaks and cuts. Alex went from a weird short/long look, to a messy ponytail, to a neater ponytail, to what I dubbed “hair commercial curls”, to the look that I settled on in the final image.

With the current look I still need to manually comb with each photo since the hair physics cause a lot of graphical errors. I went through multiple methods to try to make the hair work, from external scalp objects to geometry nodes, to a combination of geometry nodes and particles like what I did with Mara. Despite my best effort, nothing worked exactly perfectly, and I still may need to redo it again in a future iteration.
A Little Change Goes a Long Way
I’d also like to note here on just the amount of improvement I made between the end of the project and when I first created these characters. You have seen now a few of the renders I did to show off things like Finley’s old outfits and Alex’s various hairdos, and those were all from before I really started working on the final image. I blocked out the basic look of the bedroom before this, but it was essentially made up of cubes and mannequins. The feedback I really received during the challenge really helped me tweak my own process into making these beauty shots better than they have ever looked. Not to mention that I think the RenderMan engine makes things look a little softer or more filled out than the Cycles render engine, at least the version for Blender 4.1. So it definitely helped with making things more life-like.
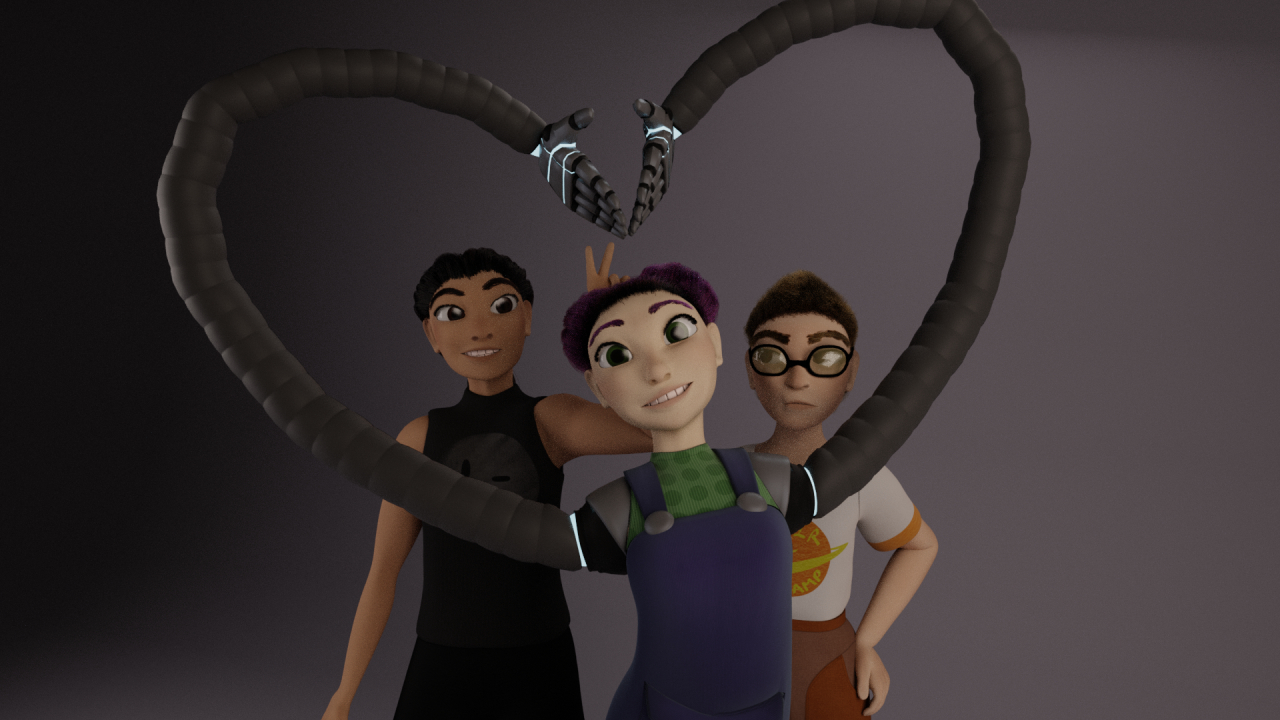
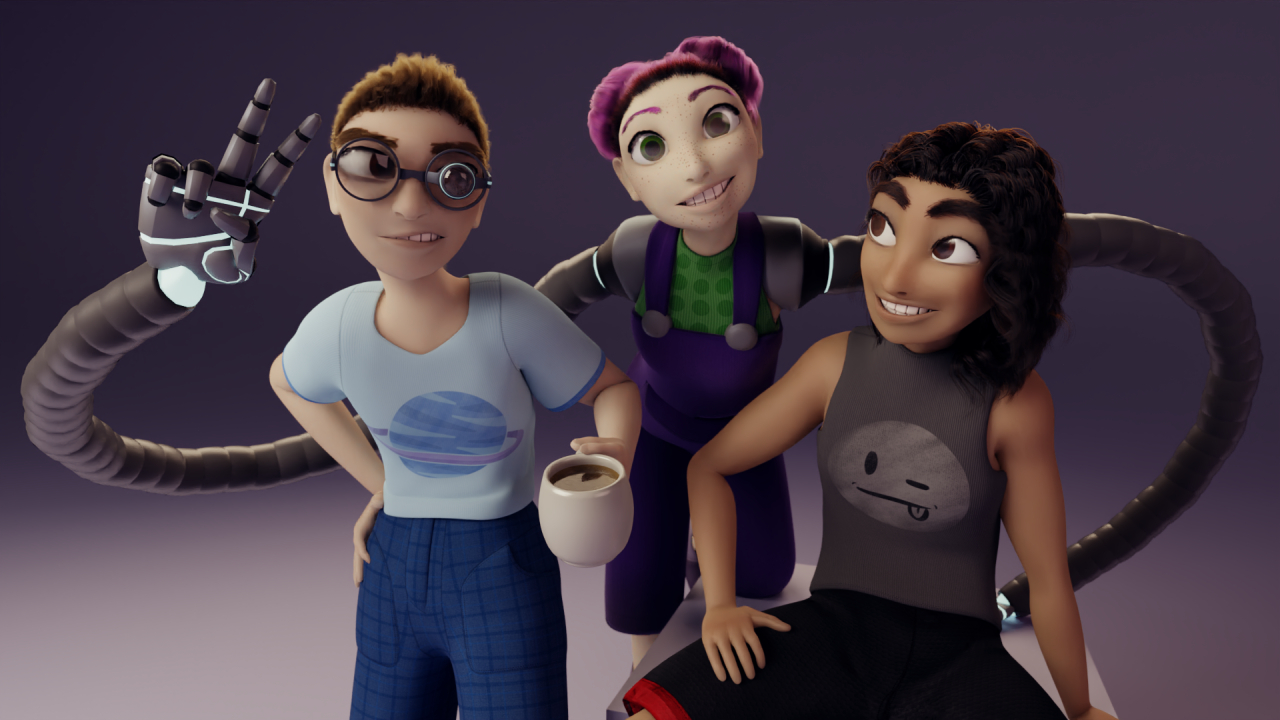
You can see in the first image the characters’ faces look more plastic-like than in the second image. This was because the texture I made for each character was incorporated into the larger shader node via the diffuse input. Using the subsurface input instead and getting rid of the diffuse factor altogether really helped to soften their skin and make them look more alive. Its something I hadn’t thought of before, but I do want to try it out with other characters in future projects to see if it works the same way with the Cycles render engine.
A bit of depth of field, rim lighting and a strong key light also works wonders to make sure they actually stand out from the background. While I understood this to an extent, I really needed to work on putting it into practice, using the lights to shape the characters’ forms rather than just making sure they were visible enough.
That’s All Folks! (for now…)
At the end of it all, and despite all the hangups, I can honestly say I had fun making these characters and the final image. Each of them had something to learn from, something that I may need to redo in the future. Despite the faults, I still think I did a pretty good job with them overall.
That goes double for the environment. With it, I tried to not only convey what the context was behind the image, but also insert each of the character’s personalities in the background objects strewn throughout the scene. That, and a few easter eggs for my own entertainment.
Did I actually achieve what I set out to do? About how long did I spend texturing each background object, and why? Most importantly, what is a Robotothon? What is The Formation? All this and more will be answered in my next post where I over explain the intricate details behind my entry to the SciArt Challenge: Robothon 2033. Stay tuned!