Hello! This was another side quest, this time into the wonderful world of swords! So Cara has another prompt month called Swordtember. As the name implies its a month long of prompts themed around swords. This one is for day 15: “shattered.” And I understand that it not currently the 15th, but I figured that I should get started early in case I get stuck or distracted somewhere.
I had other things I probably needed to be doing more, but I wanted to practice prop making after my last project with my Lizard Wizard. This animation took about three days and I’ll go over the highlights of it here. So, lets get started!
Concept
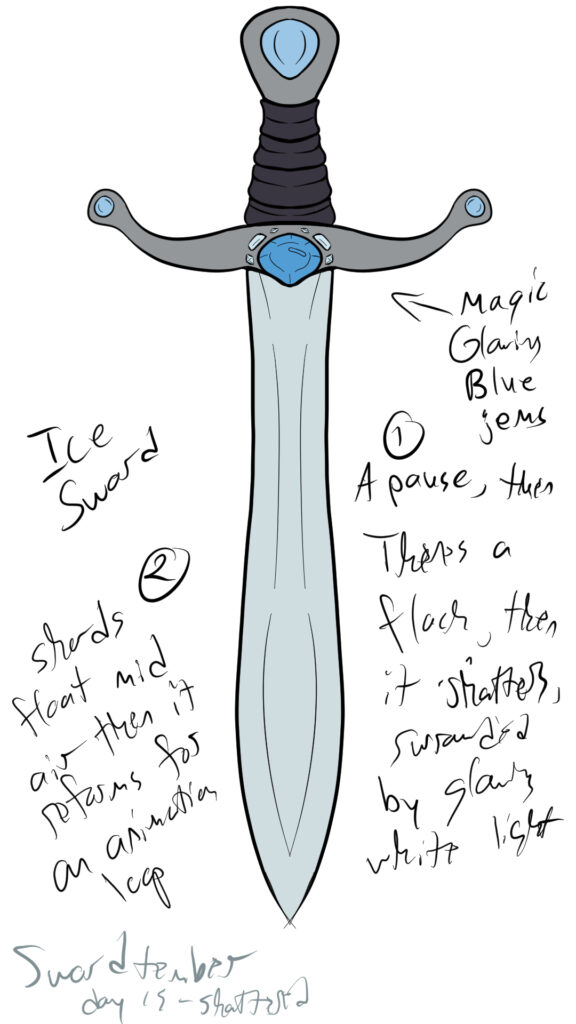
I began with some simple concept art, later using it as my reference for early stages of modeling. My original idea was a sword made of ice that would be shattered from magical means. And because it was a sword made out of ice. It would spin around, growing faster over time, then there would be a flash and it would shatter.
The final animation looked pretty similar to my original concept. But the sword looked a little too much like a prop from a video game, which is a complaint I also had about the Lizard Wizard’s staff. If I wanted to make it more realistic, it would probably be a matter of adding more detail to the texture, such as scratches on the sword or roughness to the leather handle. But that would take too long for the scope of this project, so video game prop it is!
Modeling
I started out by shaping Blender’s default cube into the broad side of the sword, using the concept art to get the shape right. Next, I carved in the detail of the sword with the sculpt mode. Like with most of my character sculpts, I used dynamic topology to add more refined details, such as the creases of the handle and where the gemstones attached to the hilt.

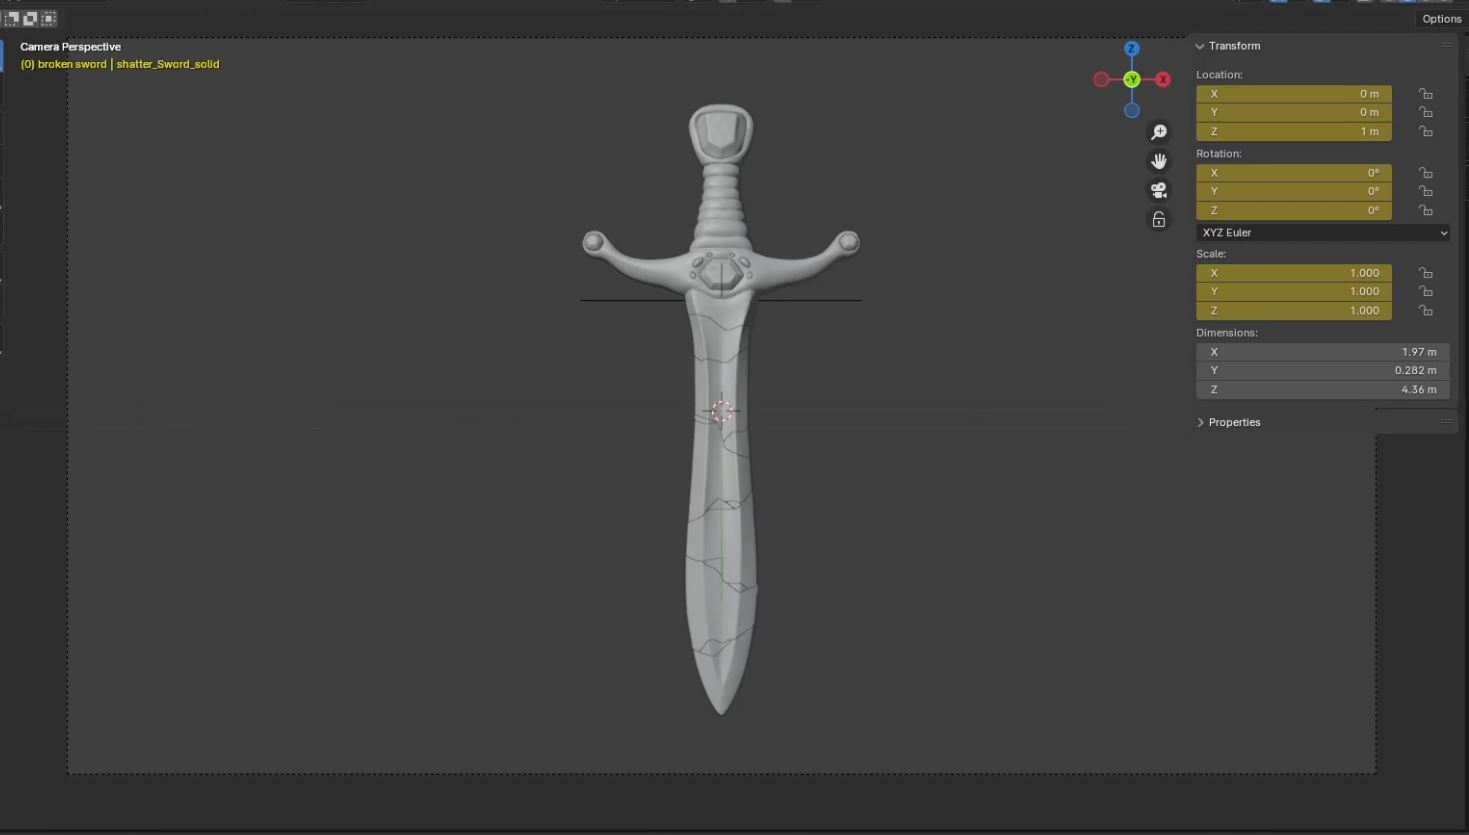
After I was happy with it I went over the whole thing again in Retopoflow to clean up the geometry. I did this pretty fast so I wasn’t thinking about the polygon count of the final result. The model has more polygons than I would have normally liked for an inflexible sword. But it also wasn’t a huge amount, so I’m probably just over reacting. Finally, I creased some of the edges and added a subdivision surface modifier to make the whole thing smoother.
Materials
For the color of the sword, I made a texture in Clip Studio using the colors from the concept art as my base. I also made a separate mask texture to separate the leather handle from the rest of the sword. This way I could make the sword look smooth and metallic and the handle more rough and bumpy all on one shader. It made things very efficient for me.
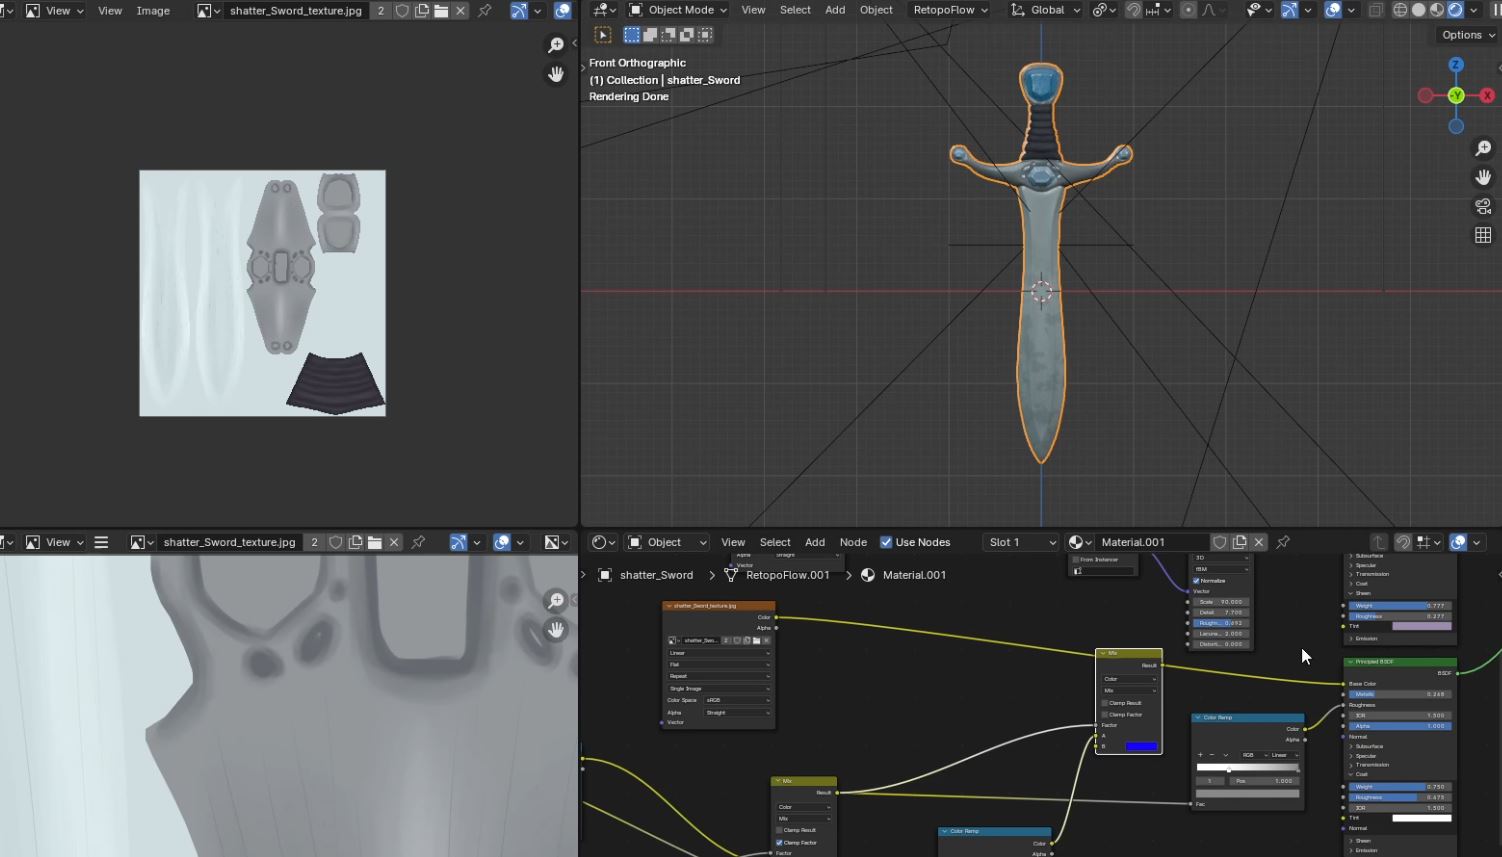
The “scuff marks”, imperfections in the blade, were initially meant to be frost on the ice sword. But despite my best efforts, the lack of contrast between the sword and the imperfections just made it look dirty. Though it did give it some nice texture so I kept it anyway. The marks were added procedurally using a noise texture and a color ramp. To keep the hilt clean, I used a texture coordinate node that allowed me to factor in the location of an empty on the z axis. Anything above the empty would be clean and anything below would have the imperfections.
Finally, I made the gemstones their own separate object with their own material. Because of the subdivision modifier, the color of the gem “bled” into the rest of the sword texture. I creased the edges at first, but it still wasn’t perfect, so I split it and filled in those parts of the hilt with a ring of triangles. Again, working quickly because I didn’t want to spend a month on a single sword and it wasn’t going to flex anyway.
The Shattered Sword
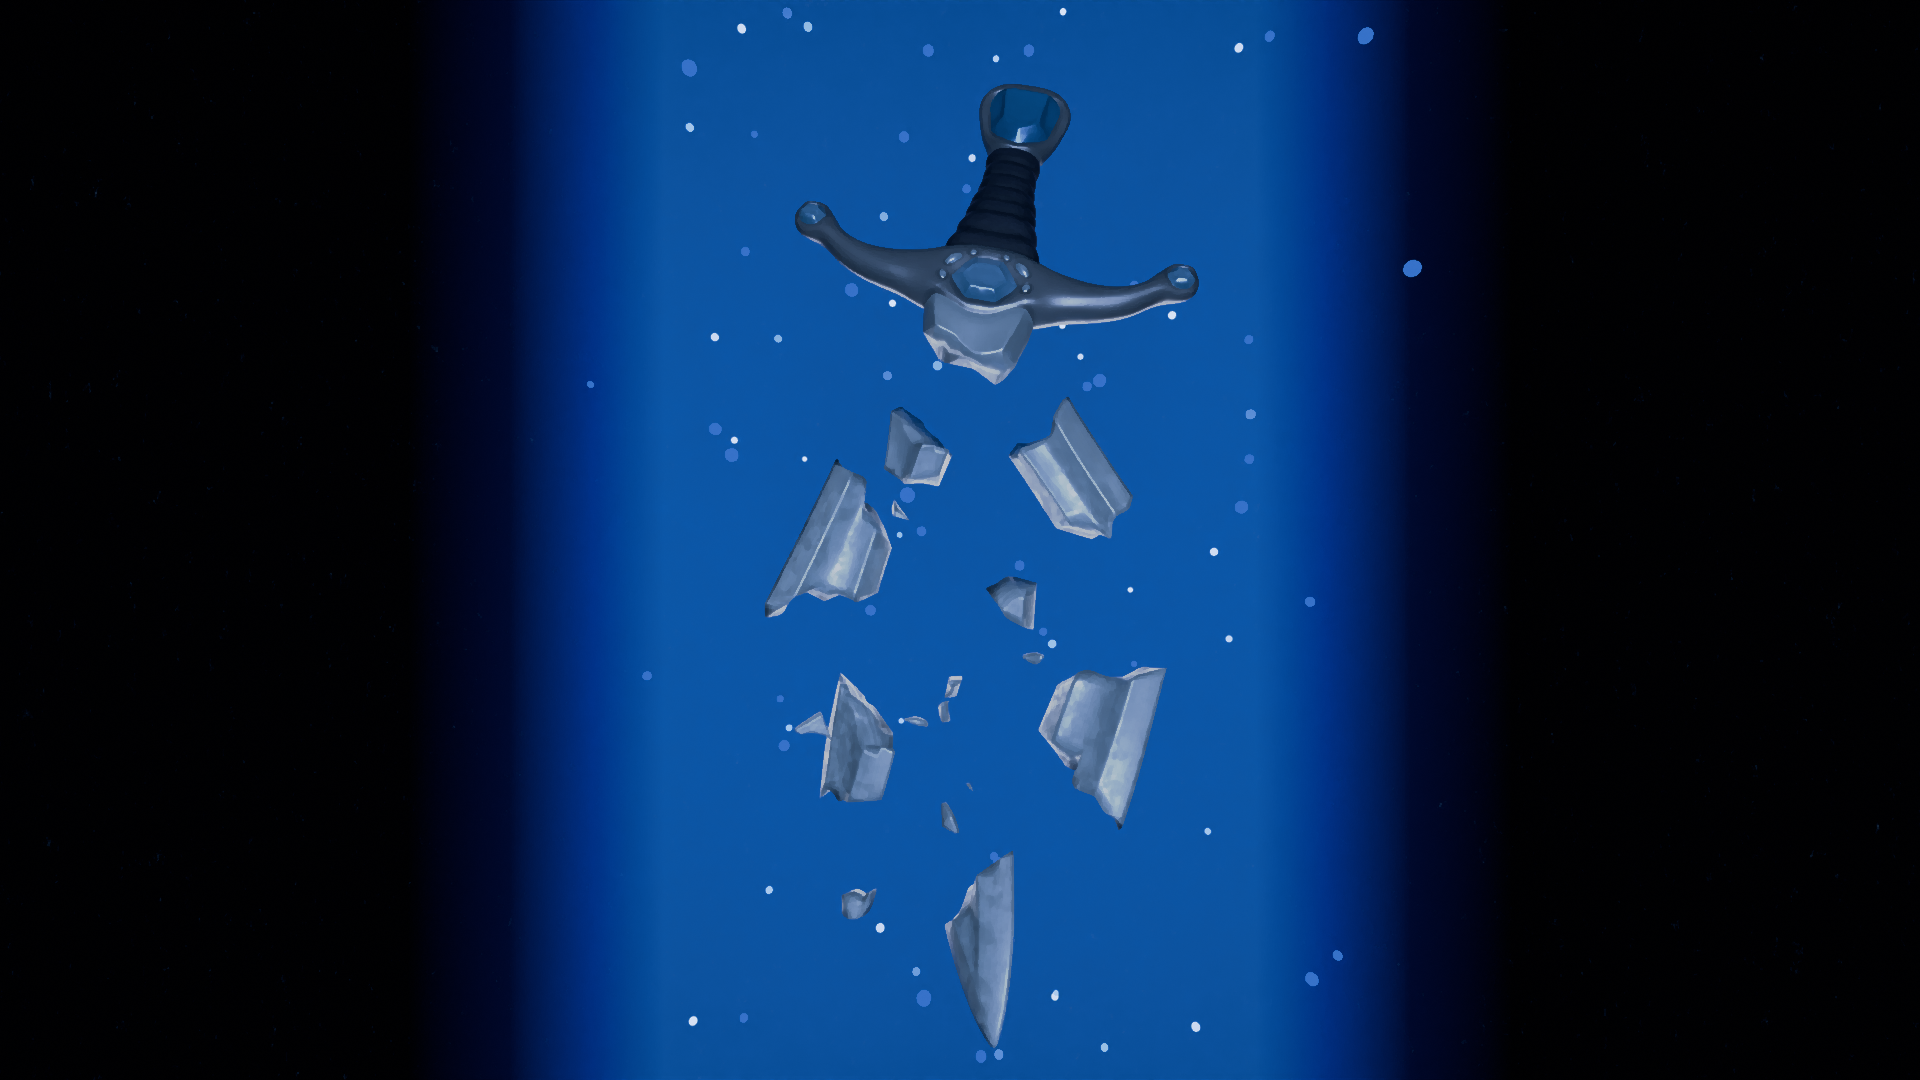
To make the animation I used two different sword models: solid and shattered. I made the shattered model by duplicating the solid model and slicing into it with the knife tool. I aimed to break the sword into large chunks to make the effect easily visible, but with a few smaller shards thrown in for smaller details. Once happy, I split each piece into its own object.
The animation has a clear view of all sides of the sword pieces while its flying around, so I needed to add some geometry to make each piece look solid. Admittedly, I sped through this part. Short of making the one giant Ngon for every open edge of a chunk, I haphazardly grouped different sets of verticies to make a face that was as flat as possible. To keep its shape from being decimated by the subdivision modifier, I added edge creases around the ends of each chunk.

While it looked okay enough, the weird geometry made for some texture glitches around the edges of each chunk that would’ve been fixed had I slowed down a bit and maybe redone the UV layout for the shattered sword. I fixed the most egregious errors, but ultimately moved on.
Animation
Solid
To make the animation, I made the solid sword and the shattered sword their own clips to put back together later. Each sword and their surrounding environment were grouped into separate collections. This was more for my own piece of mind if anything, its entirely possible to make this animation all in one render. I’ll explain the solid sword animation first.
For the solid sword, I made the spinning animation with a single keyframe to make it rotate ten times over a few seconds. I made it spin faster overtime using the curve between keyframes, which is also how I made it wobble along the x and y axis. I made the gems “glow” by keframing the intensity of the emission in the gem’s material, emphasizing it with a point light that would appear as the sword slows to a stop. Finally, made both “flash” for a few frames at the end of the animation to denote where the transition would be from one clip to the other.
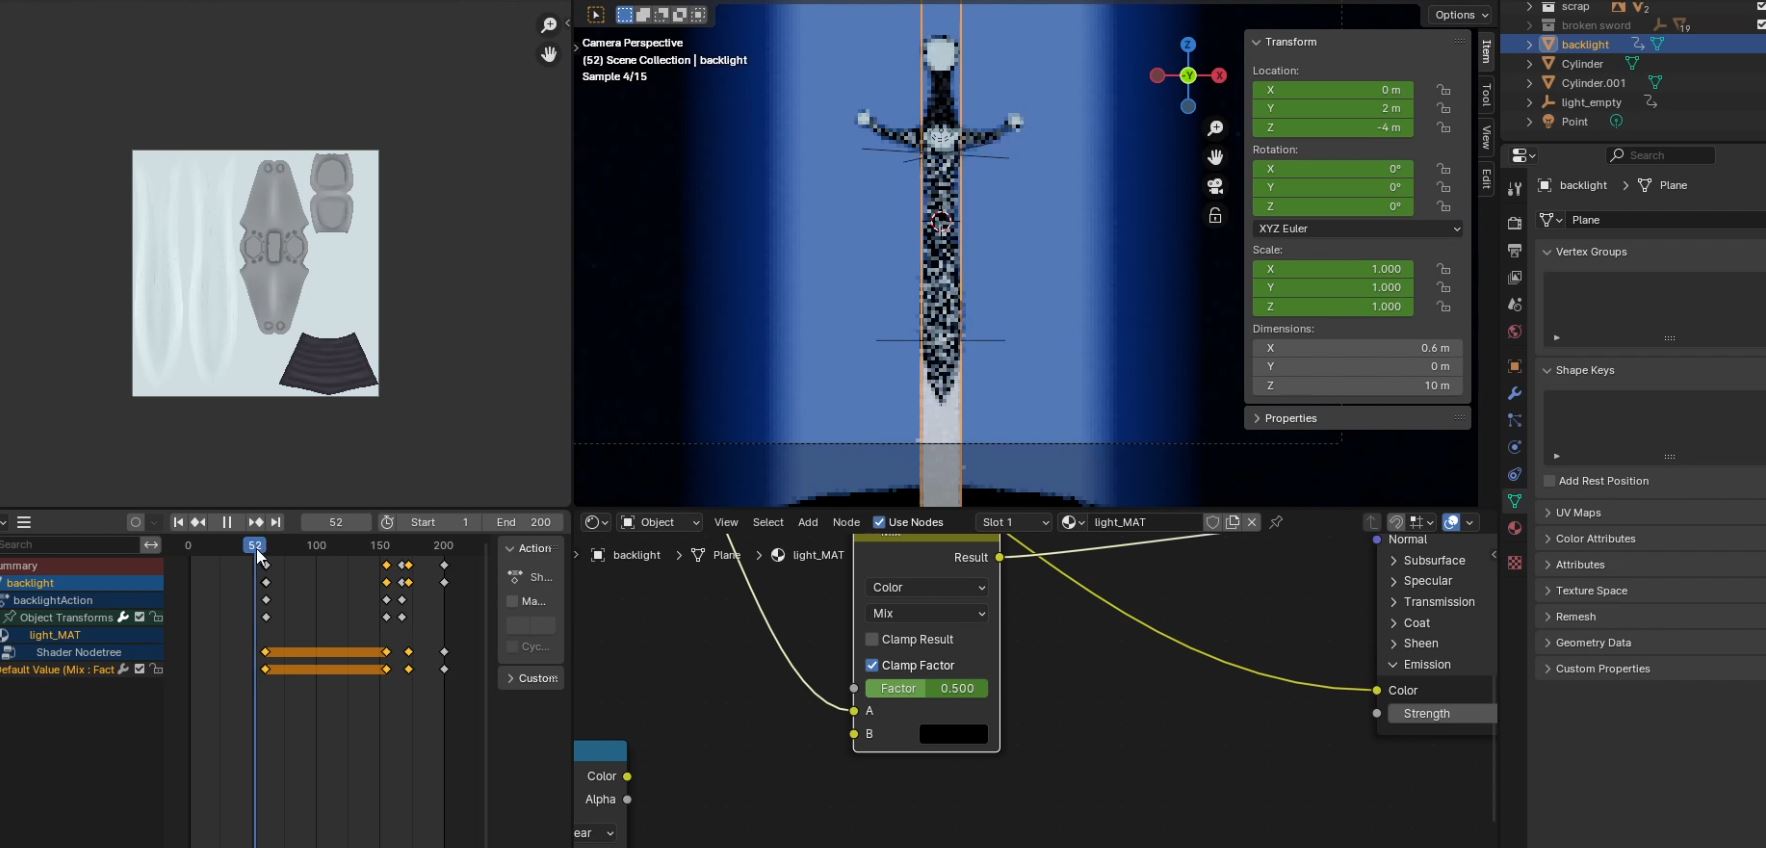
The background’s column of light was made using half of a cylinder and a generative material. This material uses a color ramp to change colors depending on where a part of its geometry was on the y axis, allowing me to make a column to surround the sword in its animation. I added that y axis factor to another float to make it appear at the beginning of the animation.
Finally, the glowing effect near the sword tip was made using a partially transparent plane in front of the sword. Like with the sword “scuff marks” explained above, I used an empty to determine where the light begins to fade in. I used a similar material for another half cylinder behind the camera that illuminated the sword. When both their empties are animated it looks like the sword is being lit up by the column. Finally, I added an area light behind the sword to split it from the backdrop.
Shattered
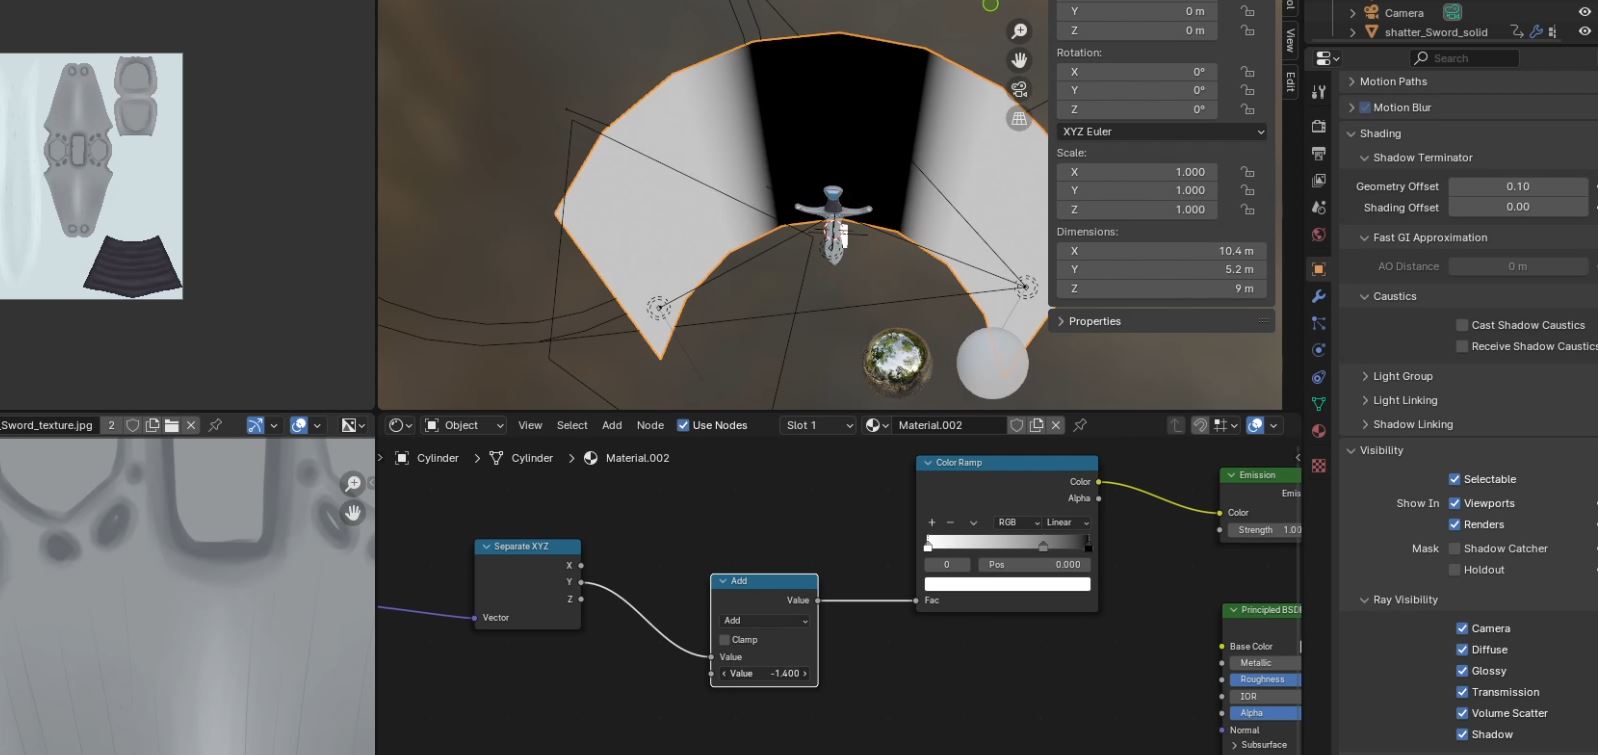
The shattered sword’s backdrop and lighting were basically the same materials, but without the animation. For visual interest I added some glowing orbs that traveled up the column over the course of the animation. These are a particle effect emitting from a plane just below the camera. Each particle is a sphere with a material made to change color depending on its location on the y axis. The further away from the camera the darker it appears, even if you can’t really tell due to lack of shading.
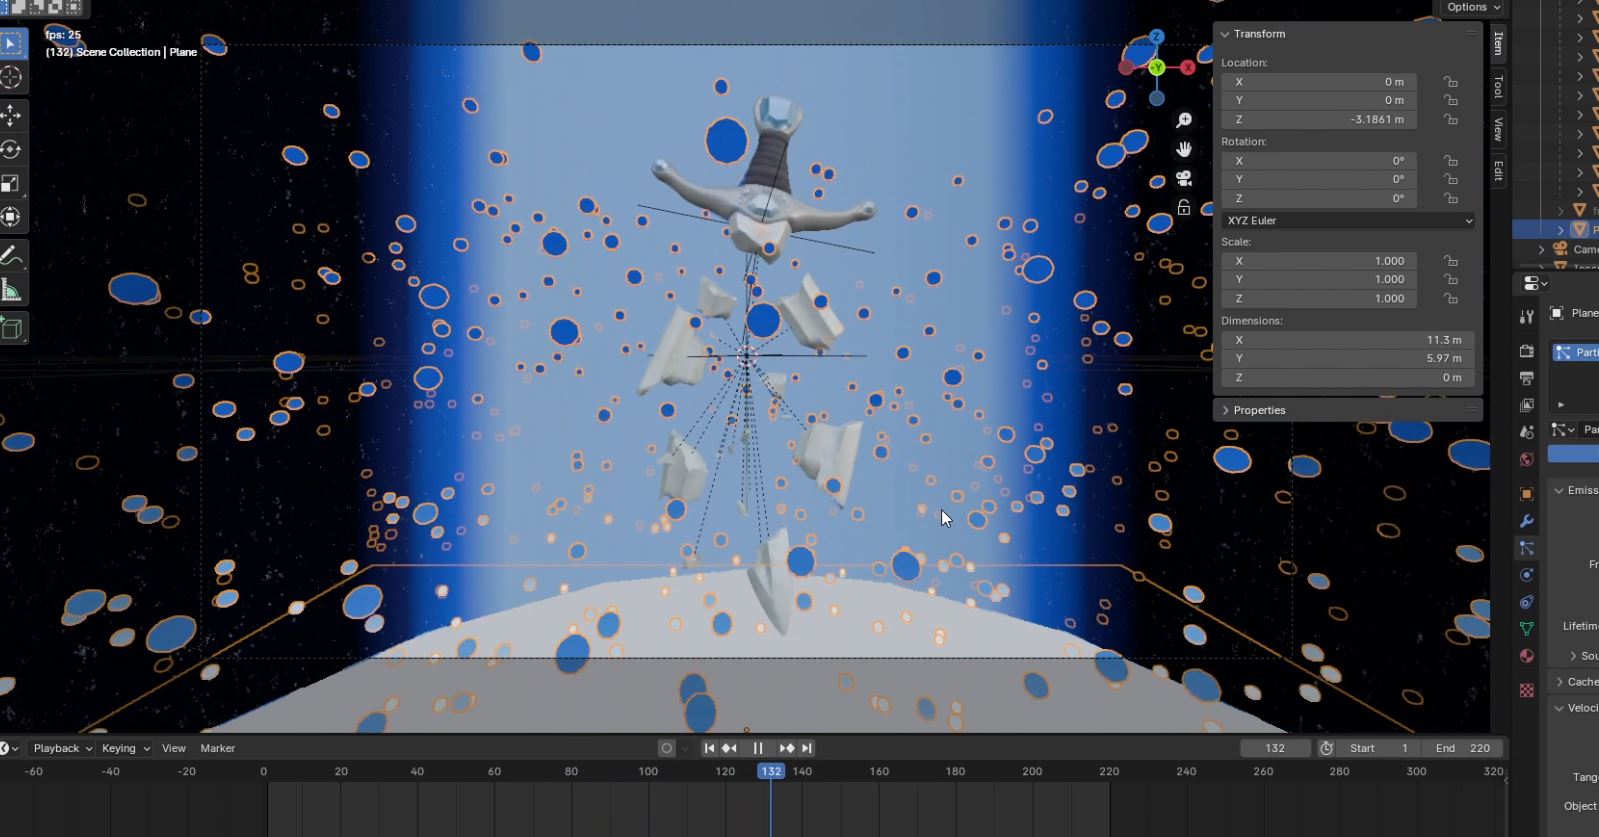
For the shattered sword’s animation, I wanted it to spin around while broken, then reform at the very end. I figured a trick to make it reform more easily was to keyframe the location of the shards together, then put that keyframe at the back of the timeline. This way, I could position the shards to my liking without worrying over matching them back up in the end. To make the whole thing spin, I parented the pieces to an empty that would rotate slowly over the course of about five seconds.
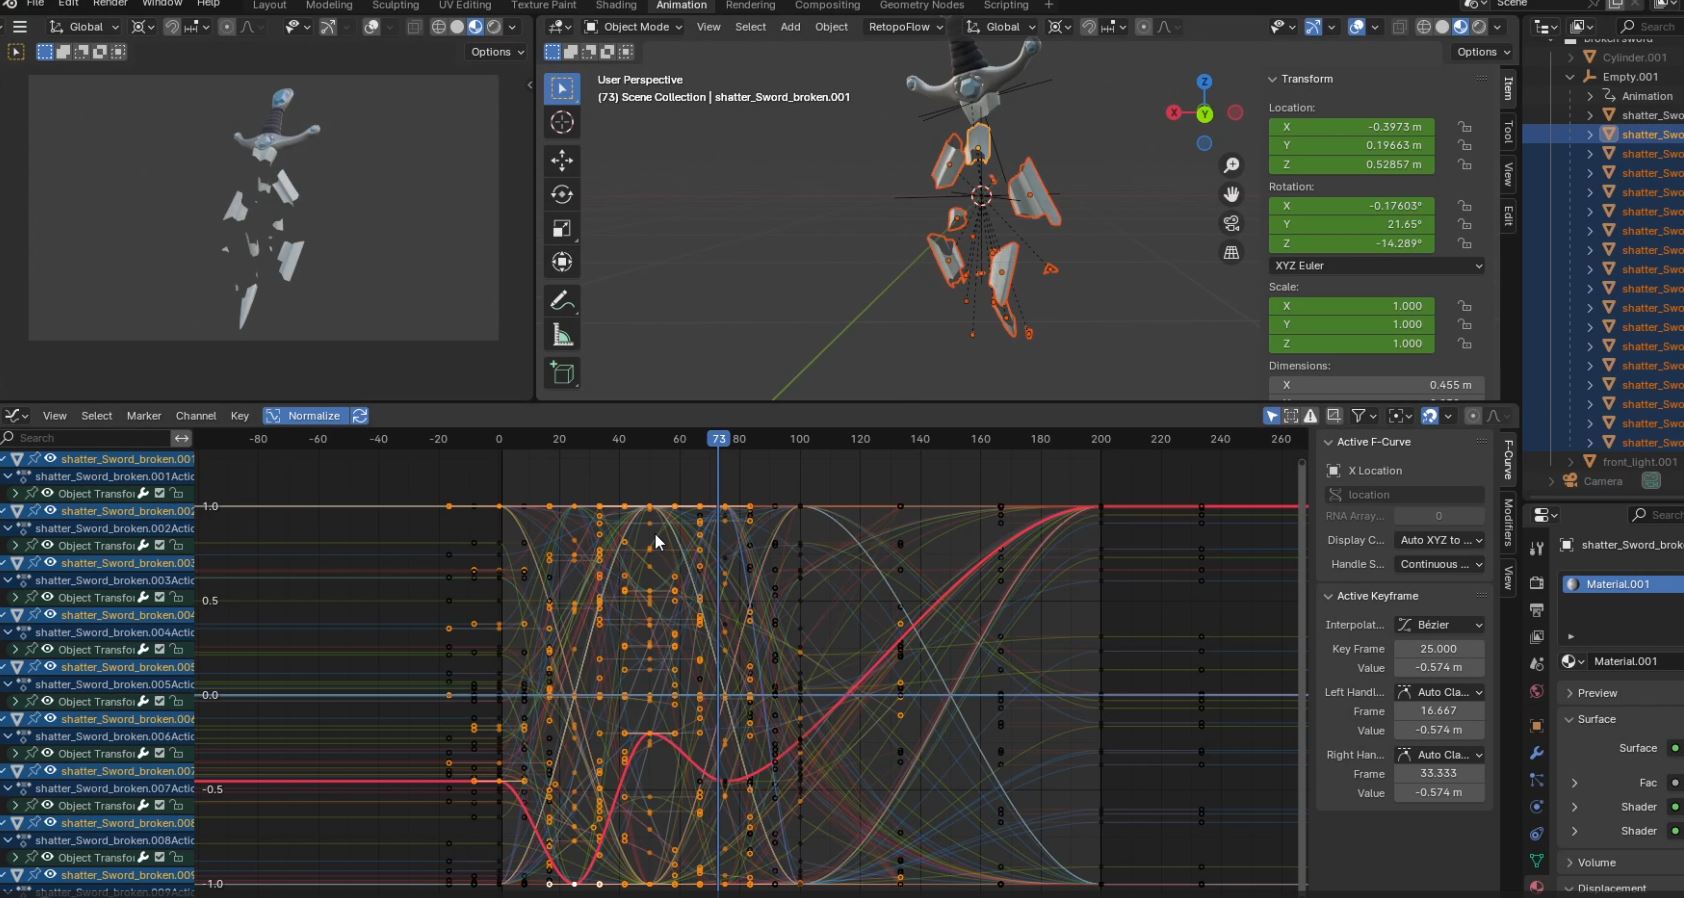
Finally, it was a matter of positioning each shard at certain frames of the animation. This added visual interest and made them look more floaty. I didn’t have an exact method to how I did this, but only a few things to keep in mind. First, I kept the keyframes to a maximum of three to avoid any harsh jittering. Next, I made sure they didn’t move two fast between the keyframes. Finally, I made sure the pieces didn’t overlap too much for too long, especially the smaller shards. Once I was happy, it was time to render.
Finishing Touches
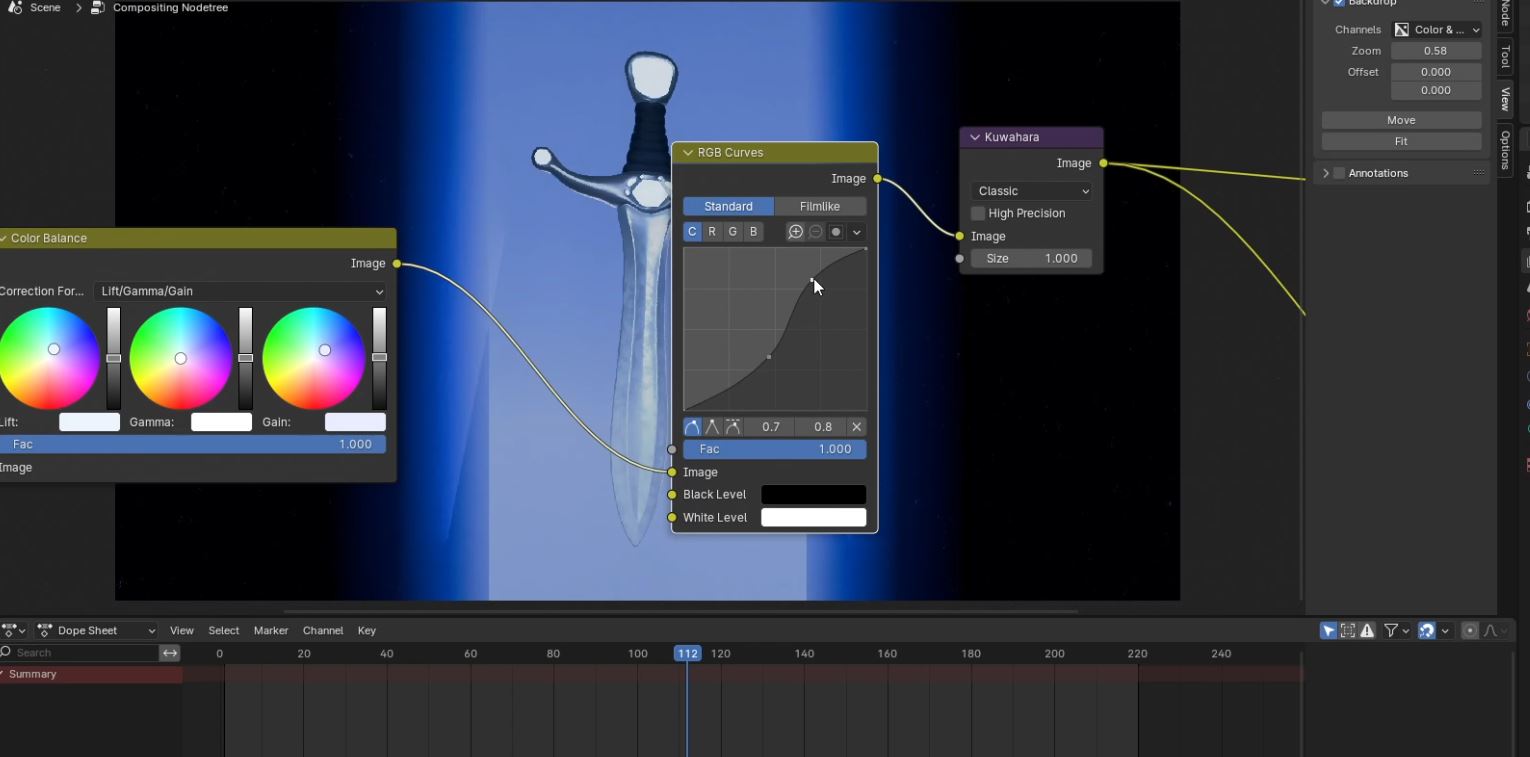
For post-render compositing, I found it necessary to make the sword pop out a bit more from the background. As is, it was starting to blend in. The desaturated colors of the blade and hilt also looked a bit drab. I added a color balance node to make the clip look a bit bluer and a RGB curve node for some additional contrast. Finally, to soften the harsh edges I added a slight kuwahara filter. This did not help the “video game prop” appearance, but it did look pleasing to the eye.
After rendering both clips I mashed them together in Premiere Pro. The flash transition was made using a clip of pure white that would fade in as the light flashed in the end, emphasized with a strong brightness/contrast filter. Finally, I added some sound effects from Pixabay and called it good to go!
The Sword has Been Forged!
Overall, I enjoyed how it turned out, even if it looked a bit too “video-game” -esque. While I want to work on making more realistic props in the future, I also don’t want to go full realism. As of right now that’s not really where I want to take my art style. To practice more props, or just make more art in general, I may do more for Swordtember over on my Cara account. If I do, I’ll make sure to put it on an Artist Snapshot post at the end of the month.
I hope you enjoyed yet another tangent from what I aught to actually be working on. Until next time!