Hello folks! Hope everyone has been doing well these past few totally normal months where no noteworthy news happened at all! But ignoring all that I recently completed a new project! This, is Oril.
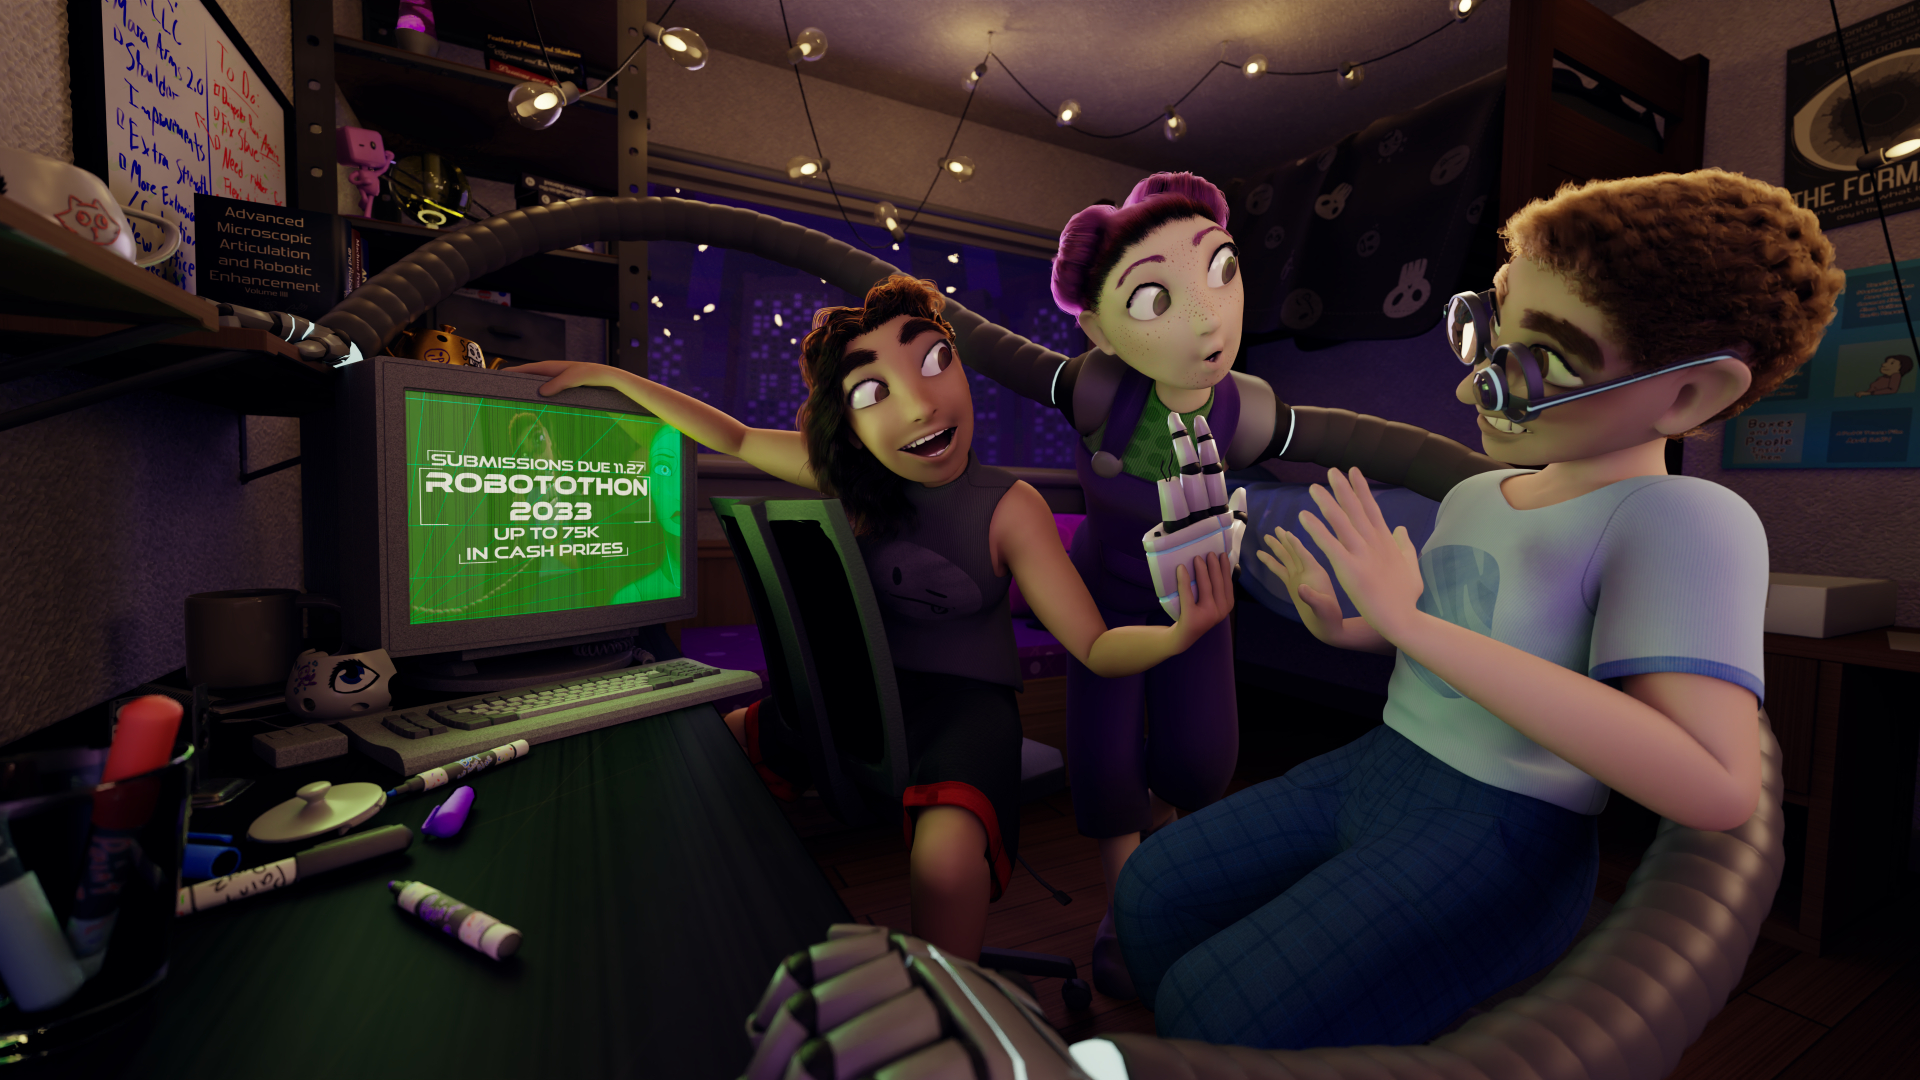
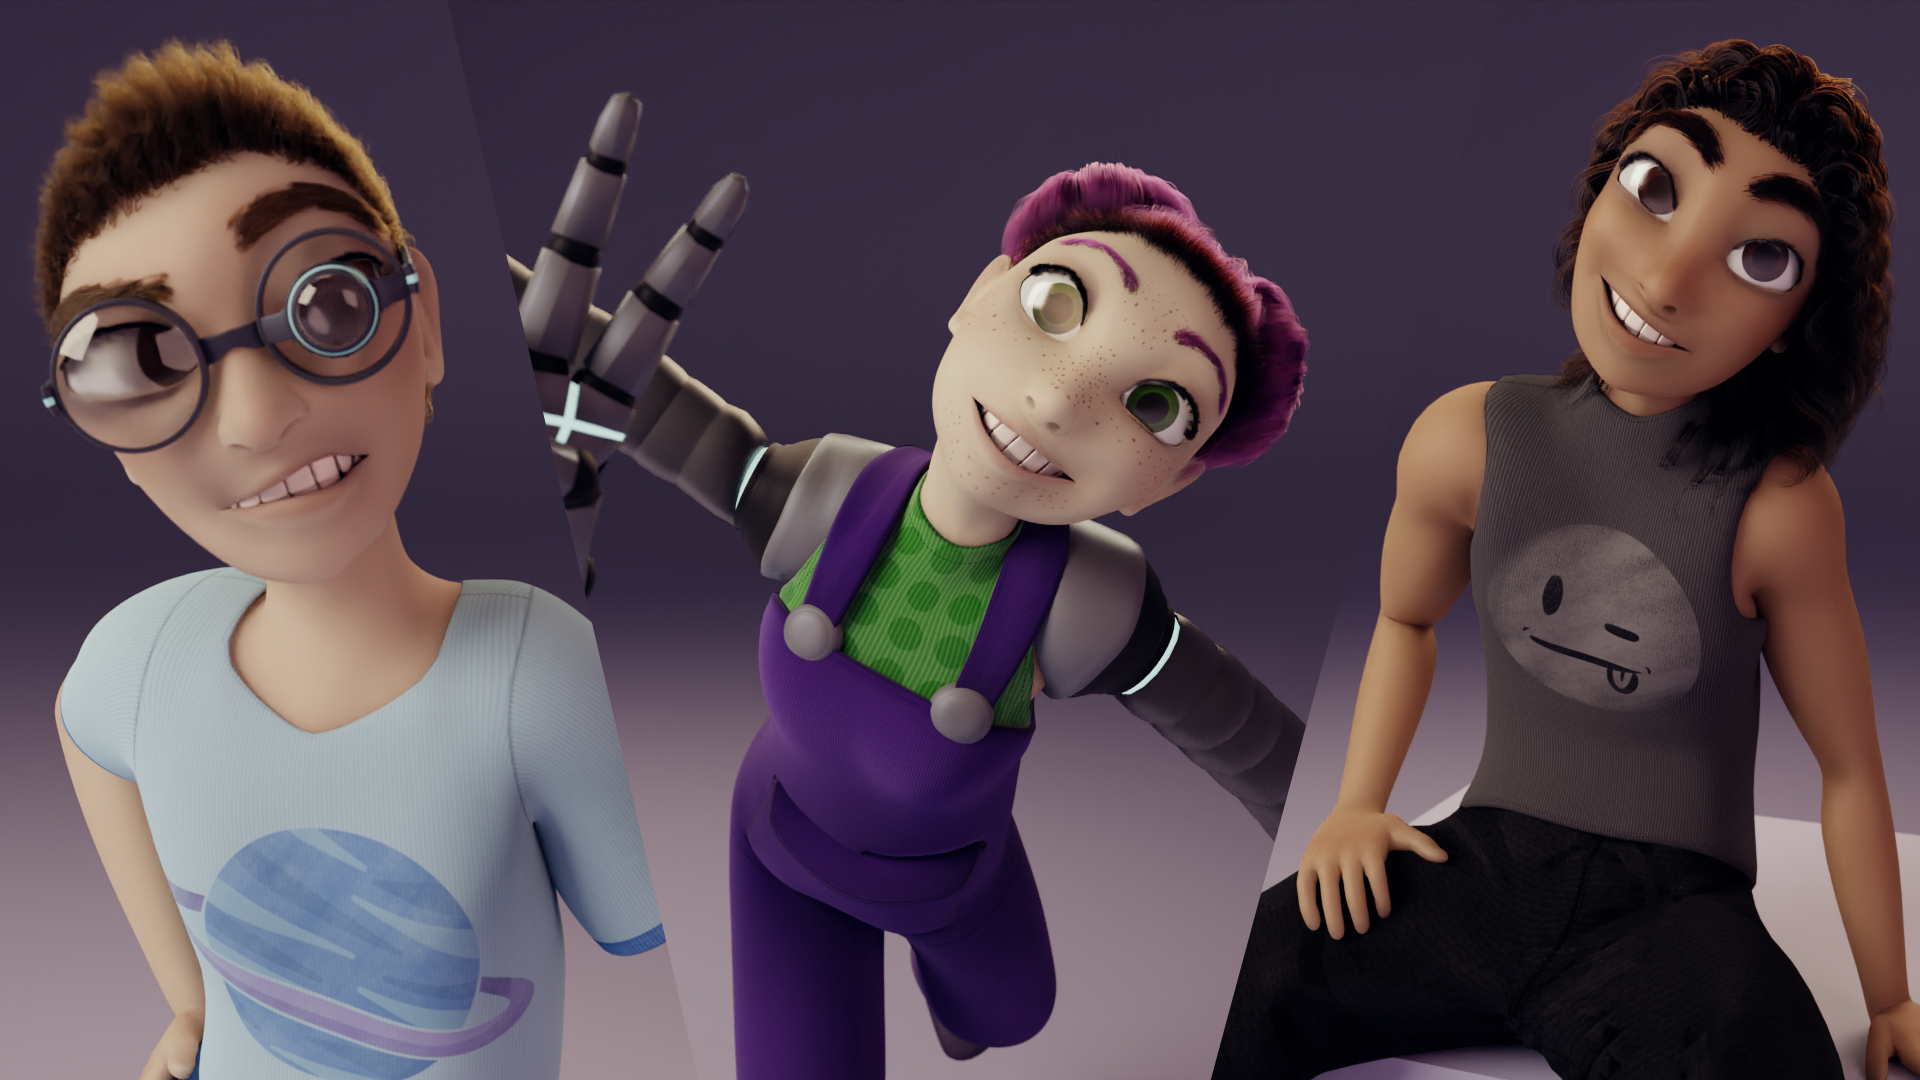
She’s part of a larger world as part of another project I completed shortly after. The post on that will going up shortly, so stay tuned!
I’ll be going over the broader steps that I took to bring this character to life today. While I’m no expert and do not claim to be, I did learn some great things that I also wanted to share here. Thanks for reading!
Oril’s Version Alpha
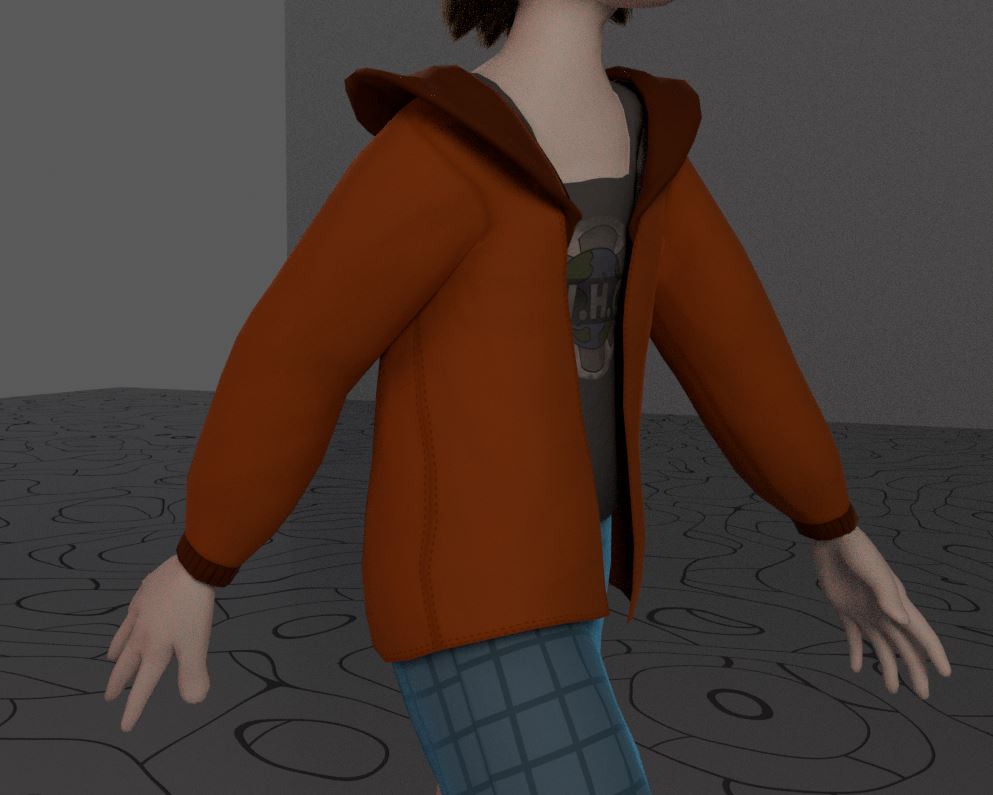
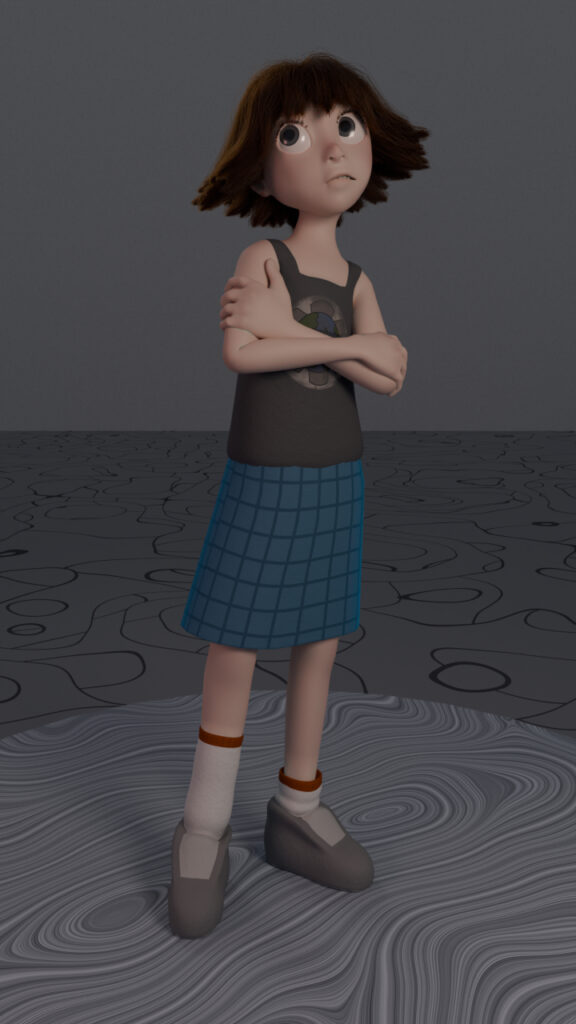
I started off with the the character reference. The world she lives in is fairly similar to ours, but more near future. I reflected that in her outfit. She’s also meant to be an ordinary person, the bright orange jacket her only defining feature. In the larger image she’ll be far away from the camera, so the jacket will make her stand out as the only orange thing in the scene. I balanced out the color with the details on her socks, one rolled down for asymmetry. The rest of her outfit is various shades of blue, green, and gray.
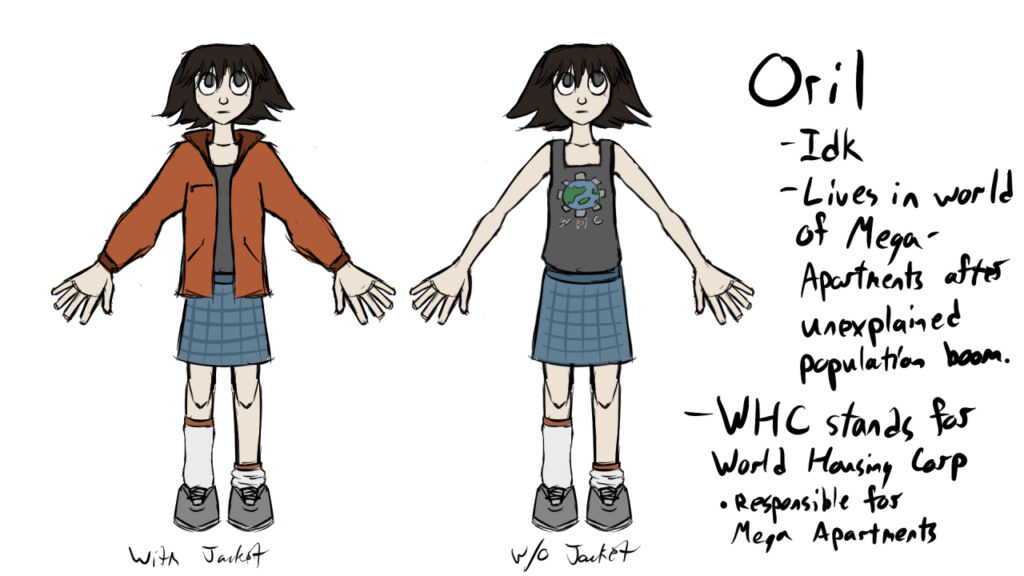
I used the logo on her shirt to build out the world a bit. In her world, there’s a company called the WHC, or World Housing Corporation. After a strange population boom, the WHC made these massive, sky-scraping apartment complexes to house everyone. They also make branded clothes because they could. Later, I would add the logo to the back of her jacket too. This is just because I still wanted the logo visible from the back as she’s looking at these larger than life buildings
Really quickly, I wanted to go over her name, Oril. I came up with that name by sheer coincidence, but I looked it up out of curiosity and found it was an actual name. It was listed on a few baby name websites and one or two historical records according to my brief Internet search. Although, people seem to go back and forth on the name’s origin, it does exist outside of this character. No reason to go on this tangent, I just thought it was interesting.
Onward to Blender!
Making the Base
After the concept art was done it was time to get started with modelling. I did my best following the reference sheet, I even made another sketch of a side view. While I knew a 3D model would look different from a 2D sketch, I still tried to translate the facial features and body proportions into their most accurate 3D versions. So she ended up with an overbite, but it adds character.
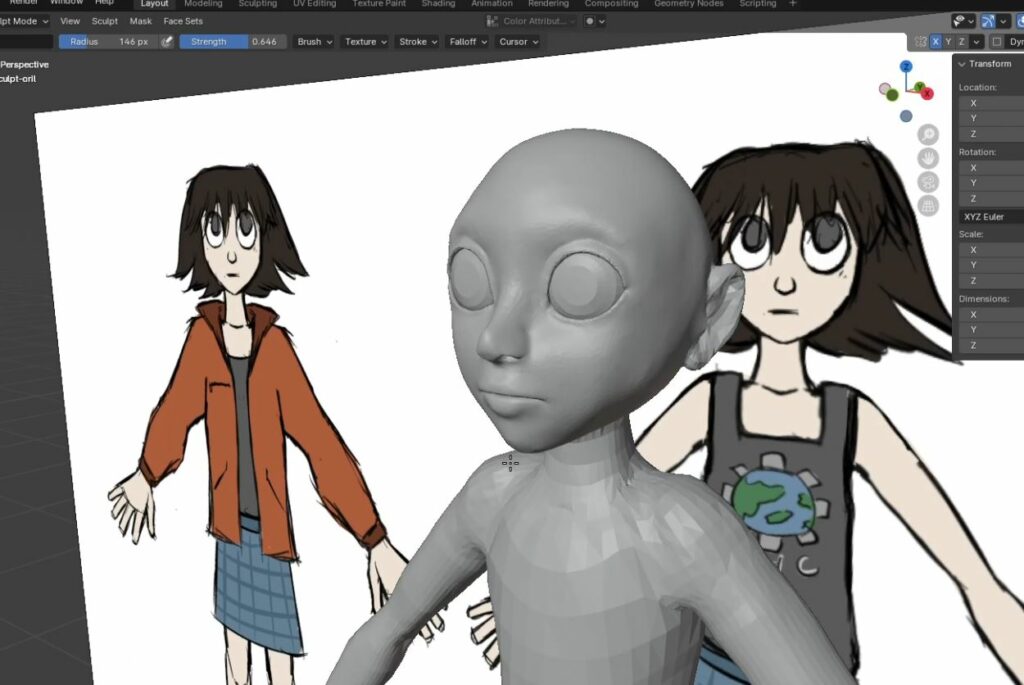
I modeled the base first, and the clothes second. I wanted to model the base separately for two reasons. One, I was rusty with human models and I needed the practice. Two, if I ever wanted to change her outfit in future renders it would be easier to do so with the base already ready to go.
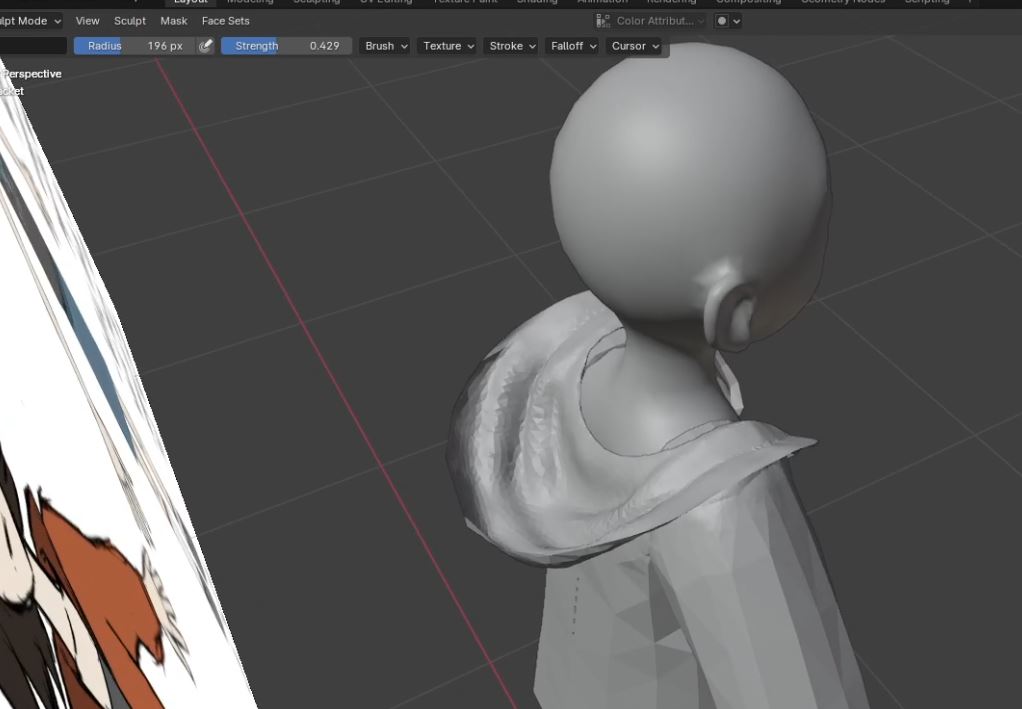
With sculpting done I went back over the whole thing using Retopoflow to remove unnecessary geometry and clean up the model. While I personally find the process of retopology tedious it’s necessary for later UV unwrapping and animation. I also made her eyes, teeth, tongue, jacket, and skirt separate from the body. For the skirt and jacket it was so I could possibly add cloth simulation, even if I ended up not doing so here. For the eyes I needed them separate to make rigging easier later on. I probably could have joined the teeth and tongue with the body, but I also forgot about them until later. It doesn’t hurt anything though.
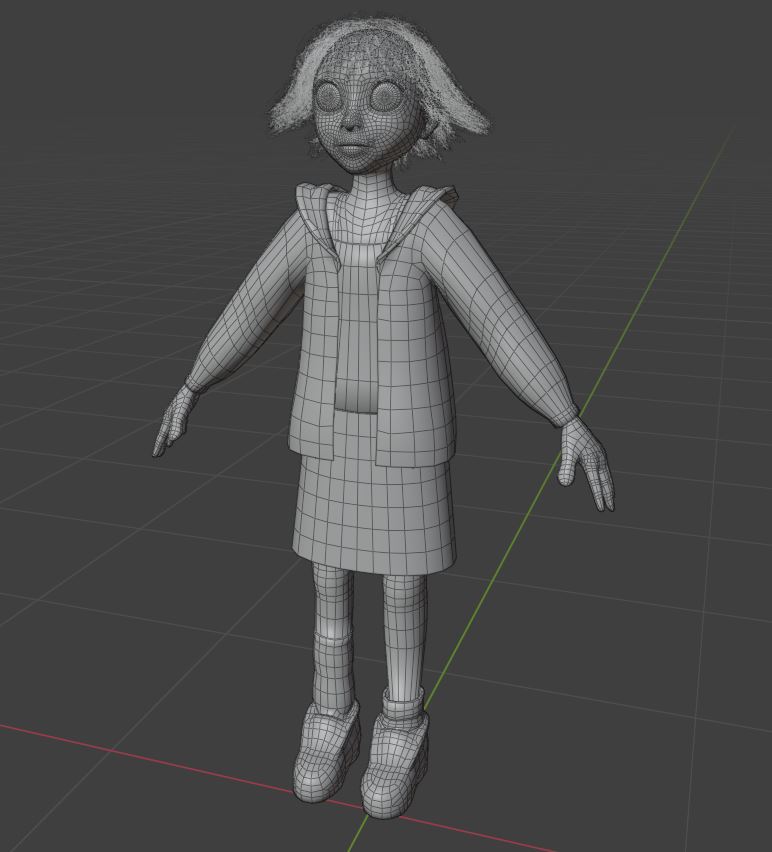
What you might notice in her wireframe model is the hair. That’s the next step.
Blender’s Improved Hairdo
Downloading the new version of Blender also came with the introduction to geometry nodes. I already got familiar with them from The Big Fish Exhibit, but I had yet to try out their new hair simulation. With their recent updates, I feel Blender has started to shift away from the old particle system tab, a good example being this new hair integration to geometry nodes. This could be for a variety of reasons that I can speculate but I’m not one hundred percent sure about. What I know is that there seemed to be more flexibility then what I was used to with the old version so I wanted to try it out.
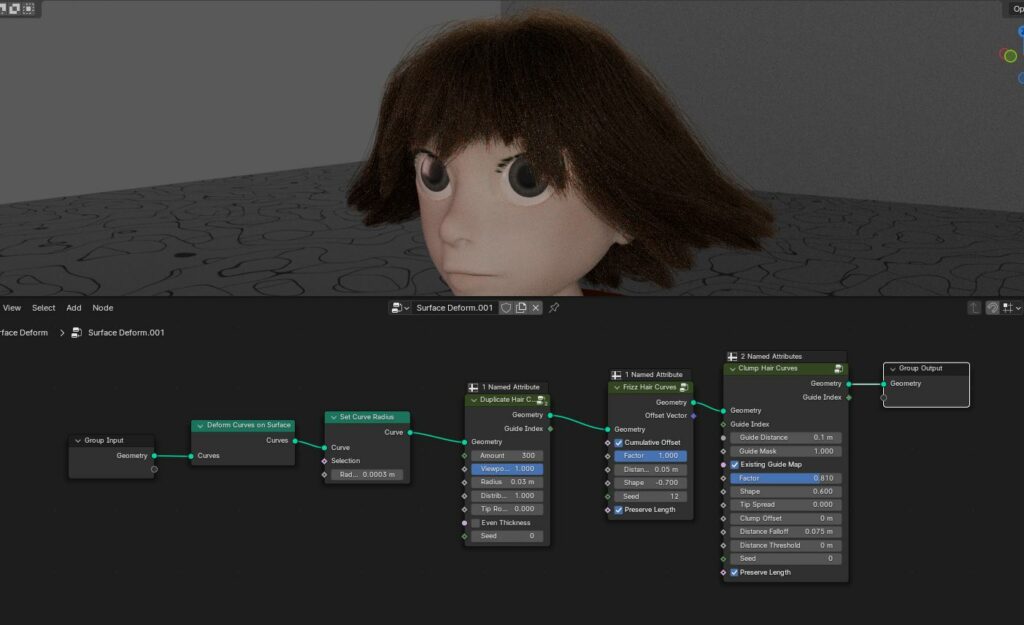
A few things to keep in mind with Blender’s new hair system. First, to get it set up I had to UV unwrap the model so the curves would know what to cling to. Then, I set down a few curves manually in sculpt mode. These curves would be a base to duplicate the many other hair strands and a guide for how those strands would clump together later on. More curves would mean smaller clumps, but there needs to be enough to fill out the scalp. Finally, in the cycles engine the hair can render as these big, obtuse looking cylinders. To fix this, the node “set curve radius” should be added, preferably before any hair generation
With Blender’s new hair simulation, they also included a lot of presets such as braids, curls, and clumps that can be altered directly in the modifier panel. I didn’t use the presets this time, but I want to play with them in the future.
Giving Oril some Color
UV Shenanigans
I decided to experiment a bit with texturing. My regular texture size of 2048px made the shirt logo look pixelated because it was too small. As well as that, the material was getting complex because the skin and clothes needed separate qualities. As an experiment, I decided to make two 2048px textures that referenced overlapping UV islands instead of one massive texture with everything arranged normally. I could have just made separate cloth and skin materials, and I did that too, but I also liked the two textures fully separated in the material editor. Minus the hair curves needing their own UV map since they couldn’t have the UV islands overlap, it went smoothly. I’m not sure if I would do it again.
But after I got back to actual progress I finished up the material for her jacket, skirt, eyes, teeth, and tongue. I made sure to add tiny details like the seam lines on her jacket, the uneven fade of her shirt logo, and the lines on her irises. I also added a bump map to the clothes to give them a more cloth like appearance, and a slight sheen to the skirt to differentiate it from the other fabrics. It was meant to be a velvet like texture, but I’m not sure how that would feel in real life. Thankfully, this isn’t real life so I don’t have to deal with it.
Looking Lively!
In the materials, I also wanted to experiment with Oril’s skin texture. Since getting back into Blender I became aware of the updated Principled BSDF shader, including the subsurface scattering option I don’t think was present in my previous version. Subsurface scattering causes the light to scatter below the surface of a mesh, creating a soft appearance. Cycles has the exclusive option for “random walk” subsurface scattering, at least in 4.1. According to the Blender documentation, it uses true volumetric scattering which is supposed to be the more accurate version of what Eevee can do. Its particularly good for light behavior inside thin or curved objects.
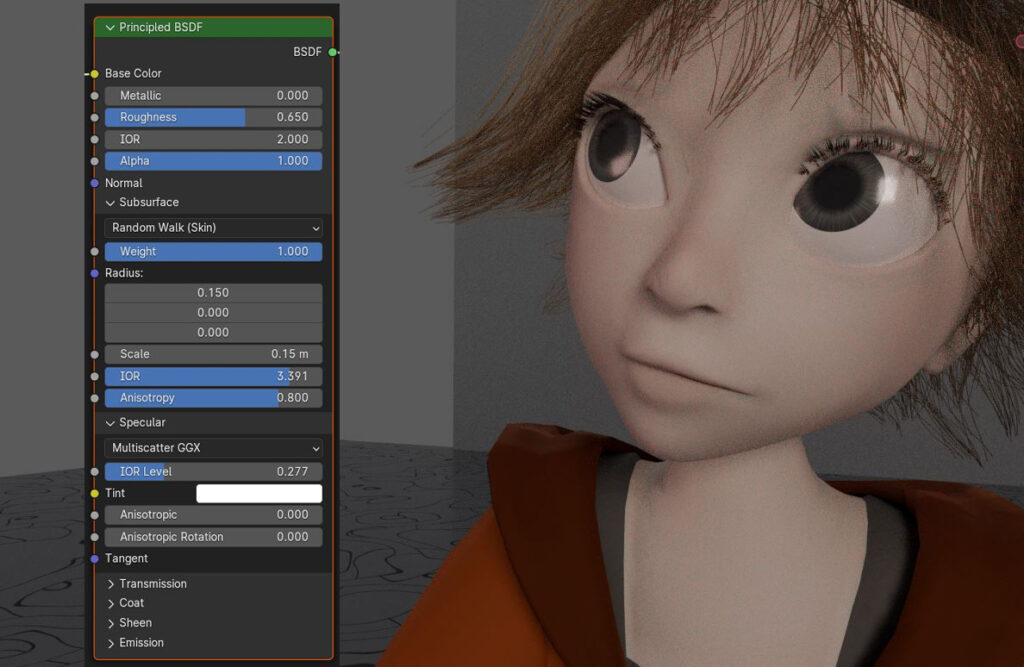
Here, I’m using the random walk specified for skin. I can control how light scatters on Oril’s skin using the radius option. The trick is that the xyz values of the radius are mapped to red, blue, and green light respectively. The higher the number, the deeper the light will go below the surface. I have red light going in Oril’s skin a little bit, but blue and green light bounce right off. Its not perfect, if you look closely you can see some errors where the skin texture ends and the shirt material begins. The random walk can have errors if the models have holes in them, spaces between the texture, or if faces overlap. But even still it looks fantastic, so I consider that a win.
Getting Ready to Move
I won’t go over my process for rigging that much, since its what I’m most unfamiliar with. I used the metahuman rig that Blender comes with in their Rigify add on, shifting the bones to fit the character’s proportions. Next, I bound the character to the rig with all of her separate objects (jacket, skirt, etc.). Then I had to go in and adjust everything via the weight paint tool and the vertex groups in order to fix obvious animation errors.
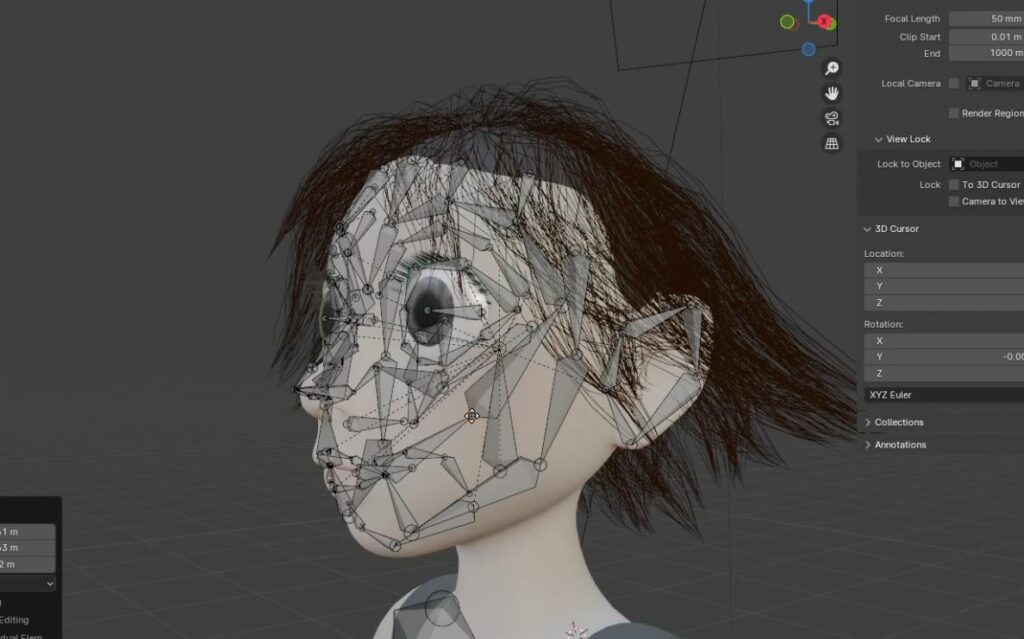
Despite my best efforts, some errors persist. For example, despite multiple attempts to fix it the skirt still clips through her knee upon if I move the leg forward too much. My errors in retopology also came back to haunt me. Her mouth, as another example, only has one point in each corner, causing an awkward sharp angle on both sides whenever I pose it. True, a lot of these problems are fixable with enough research, geometry editing, and fiddling around with weight painting. But for right now, I decided to move on.
Putting Everything Together!
Now, back to the fun bit! I already rendered one or two poses while working on Oril’s rig, but for her final animations I wanted something more interesting than a featureless void of gray. I came up with a cute showroom to display the final poses and animations, as shown in the video. And in making that, I accidentally created the single best floor design I’ve ever seen.
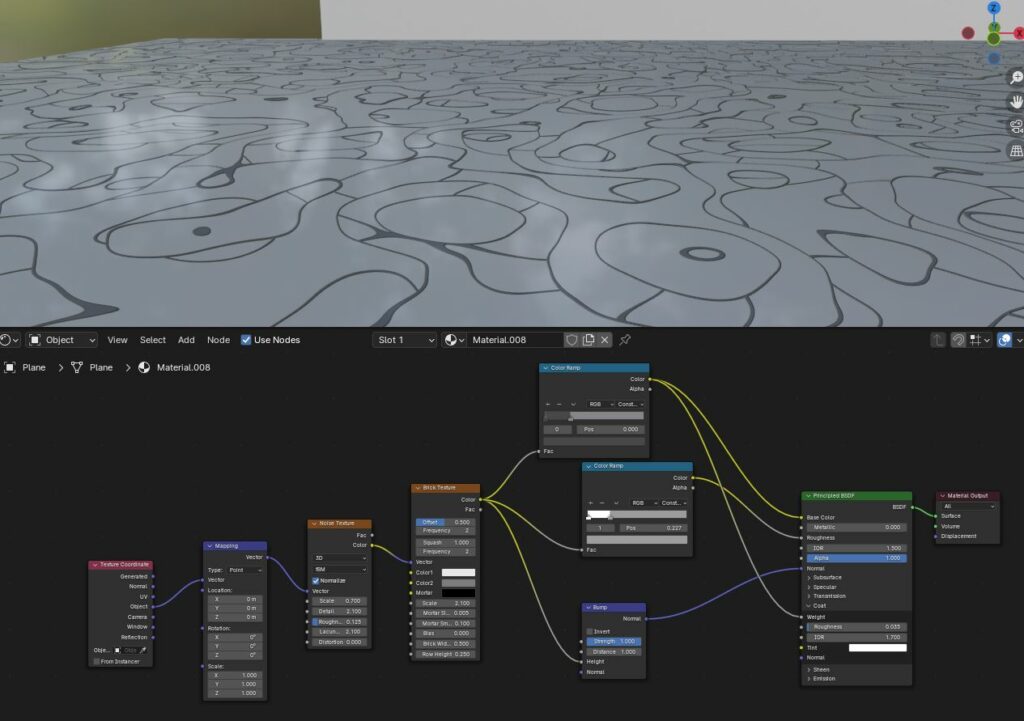
Would it be a nightmare to install and clean? Yes. But if I ever become a millionaire I want this in my house.
Anyway, back to Oril. Here’s where I started to develop her personality. I pictured her as a twelve year old girl, just learning independence for the first time and desperately wanting to be seen as “cool” and “aloof”. But she’s still a dork that wears outdated merch from a multi-billion dollar corporation that basically controls the entire planet. She thinks “sticking it to the man” means rolling her eyes at authority figures and going to the park by herself. She isn’t cool, but she wants to be.
Conclusion

And with that, we are done! That was my process for the creation of Oril. If you read it all the way through I hoped you enjoyed going through my process and all the various things I picked up along the way.
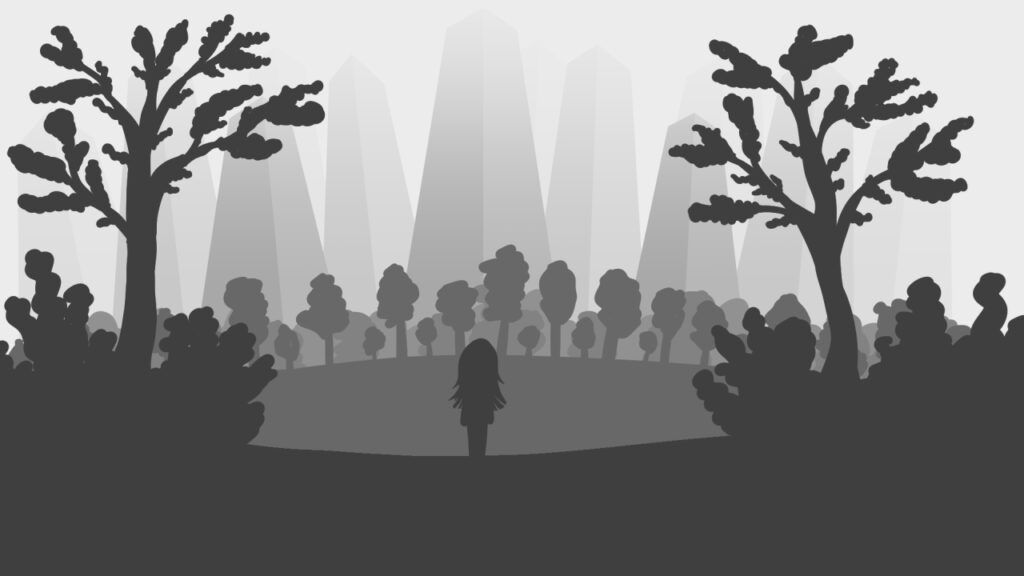
Again, this is a two part series, the next post will be focused on the creation of WHC Park. If you know more about Blender than I do and want to give suggestions I would be happy to hear them. Otherwise, feel free to let me know what you think!
Until next time!